🕸️ Web Scraping with Selenium and Beautiful Soup

This is my first article in a while. There are a couple of reasons for that. First, I have been working VERY hard on a substantial project that I am very excited about and have barely looked up from it to do much else. And secondly, a tree fell on my house and almost killed my daughter and me one month ago today. So we have been very busy dealing with all of that madness. However, I am happy to be back so I can share with you one of my favorite project types: web scraping.
In this article we will cover how to scrape articles and just about any web data with two very powerful libraries: Selenium and Beautiful Soup. This will be a fairly simplistic overview of the process, but it will give plenty enough information to get just about anyone who wants to dive into web scraping started. This intro an a little perseverance will go quite far!
Why do you want to possess the mad-awesome ability to skillfully webscrape? Because DATA! YES, because massive, endless mountains of data. And in data science, being able to obtain your own data is one of the most important skills to have. The material we are covering in this article would be a good example of typical NLP data, and so this will be a good start for anyone wanting to learn how to collect such data themselves. But any form of data can be collected this way. Pretty much anything you can find out there on the almighty inter-webs, you can collect. Again, perseverance is key.
The Code: Gist | GitHub | Jupyter | HTML | PDF
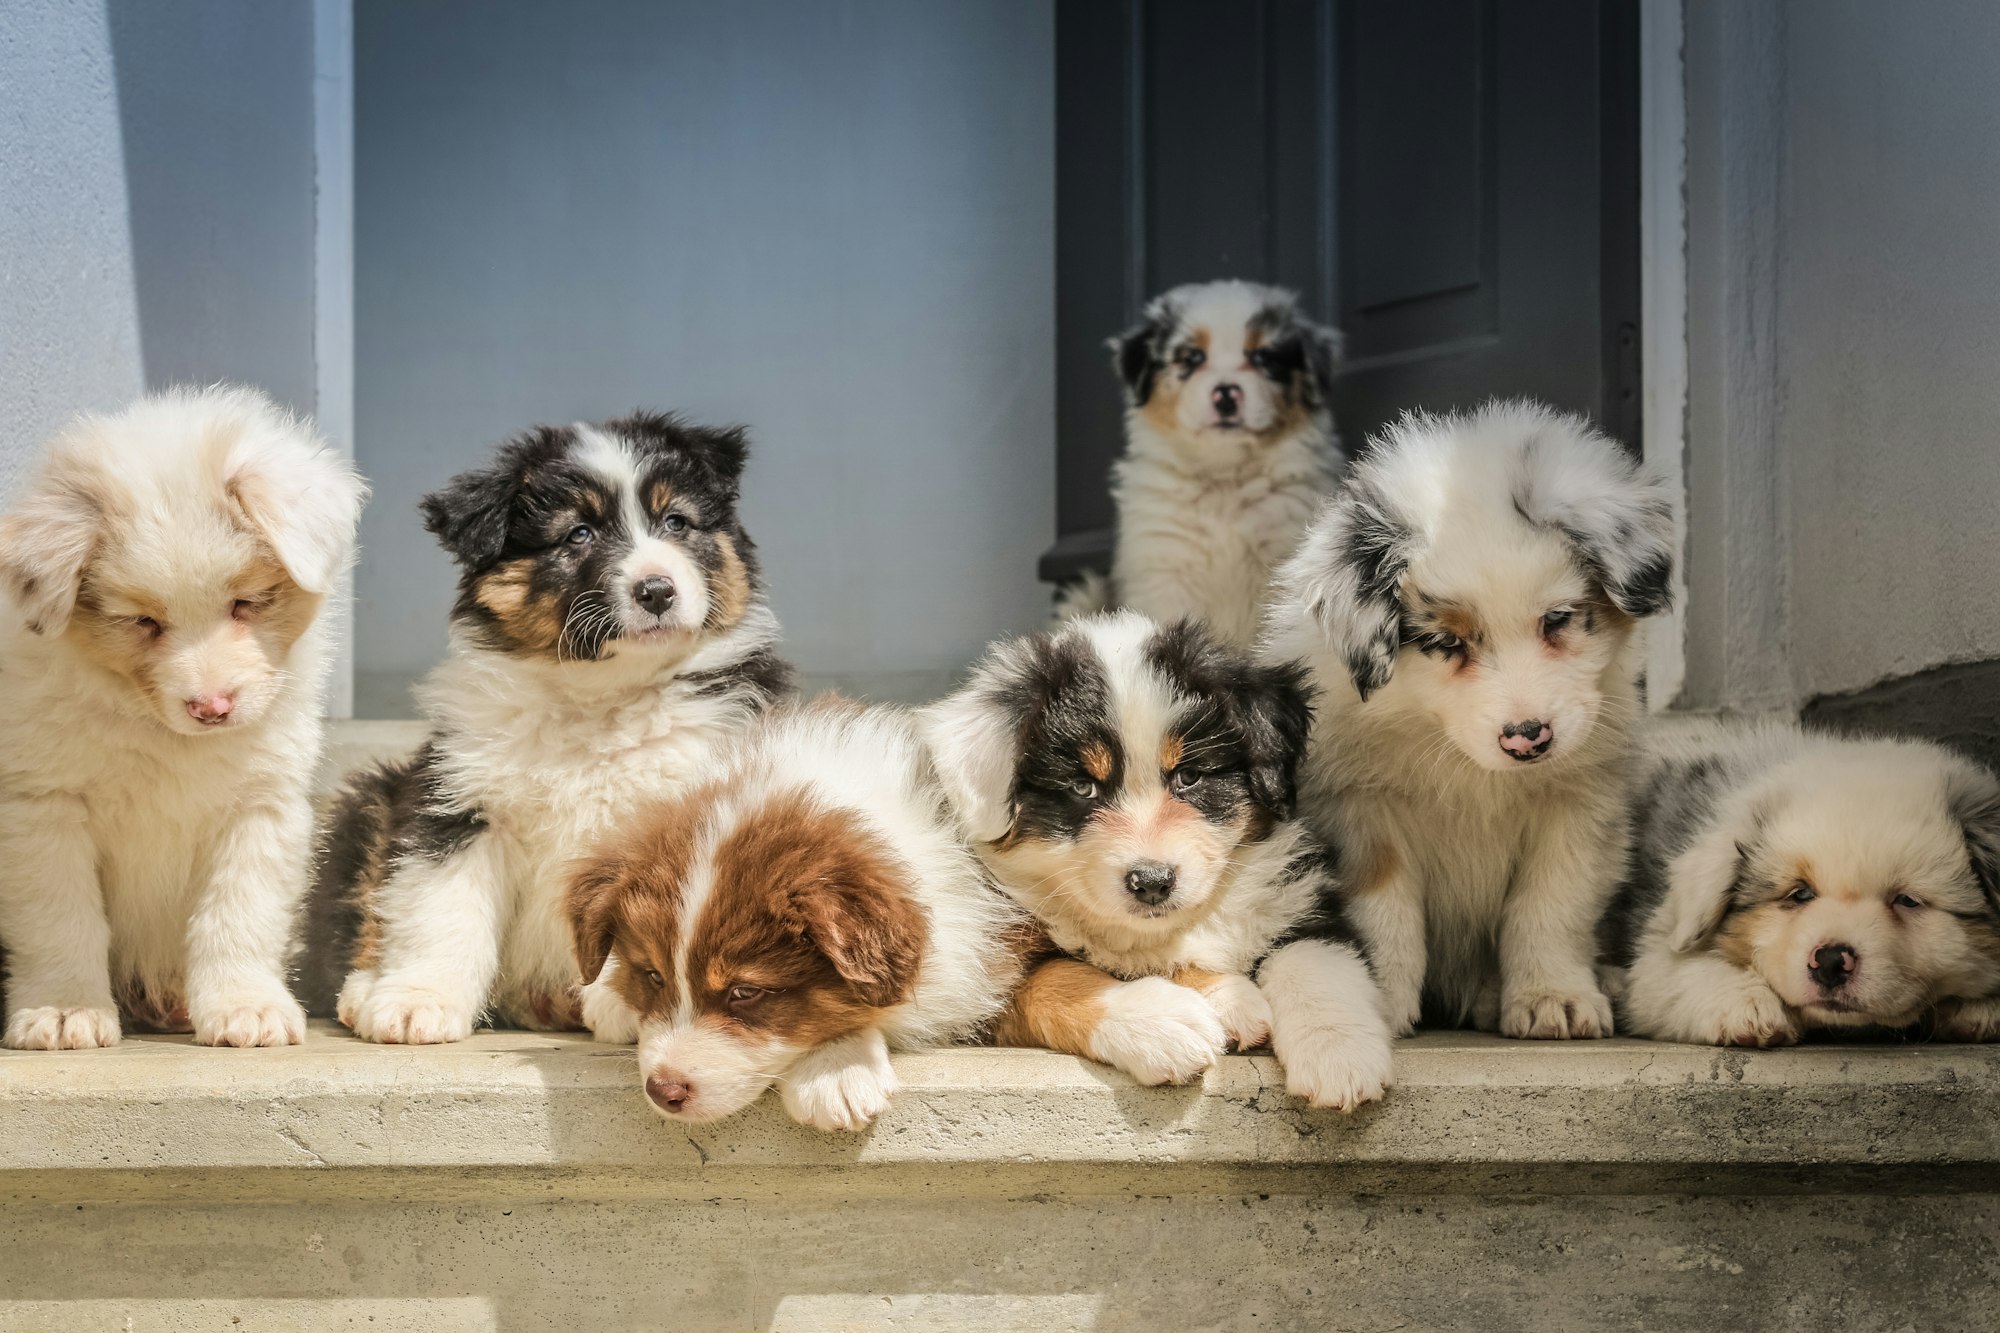
And so now, why the picture of the cute Aussie pups? Because that will be our example subject for today: "Why are dogs so cute?" First, we will scrape a randomly selected article on the subject, and then we will run a Google search on the phrase and collect the article titles, urls, as well as scrape an article from the results.
The Process
- Create a webdriver using Selenium with Chrome as the browser
- Using the driver.get(), get the data for the target URL
- Save the page_source from the driver
- Using Beautiful Soup, extract the desired bits of data from the article
Importing the Necessary Libraries
The following is the code for importing all the necessary libraries and dependencies for this project and all its various sections.

General Article Web-Scraping
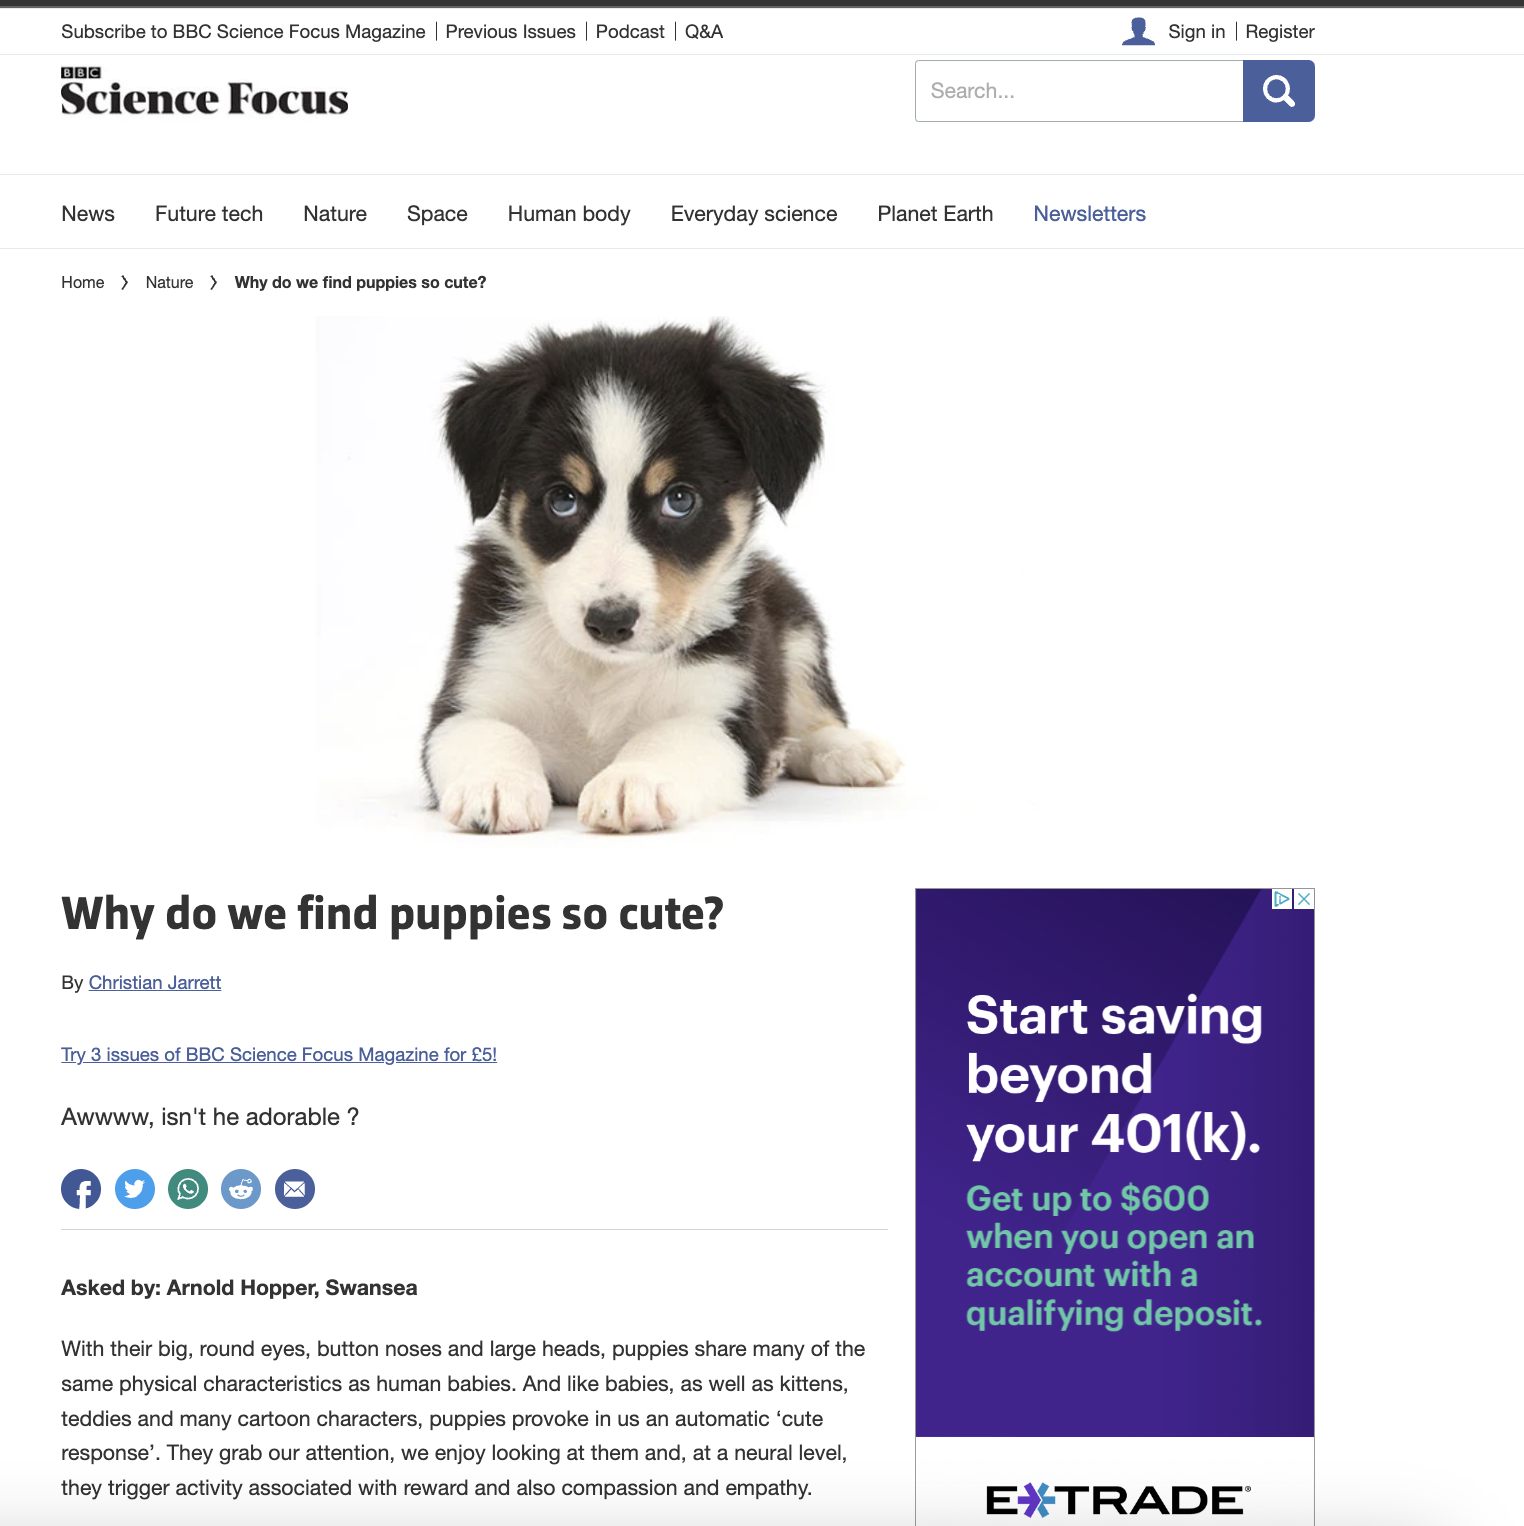
We will start by going over the simple steps to collecting data from a single website article. Suppose we take the following webpage as our first example. We are going to get the title of the article, the author, and the text body of the article using Selenium and Beautiful Soup.
The first step after importing all necessary libraries is instantiating a Selenium webdriver to do the work for us. The following code does this and then grabs the url, which has been defined just previously in the code. The sleep(5) is simply a means of waiting 5 seconds for the page to fully load before using driver.page_source to gather the HTML data from the page.
Once the HTML data has been acquired, we can use Beautiful Soup to parse the data and convert it into a format from which we can access its parts using Beautiful Soup methods.

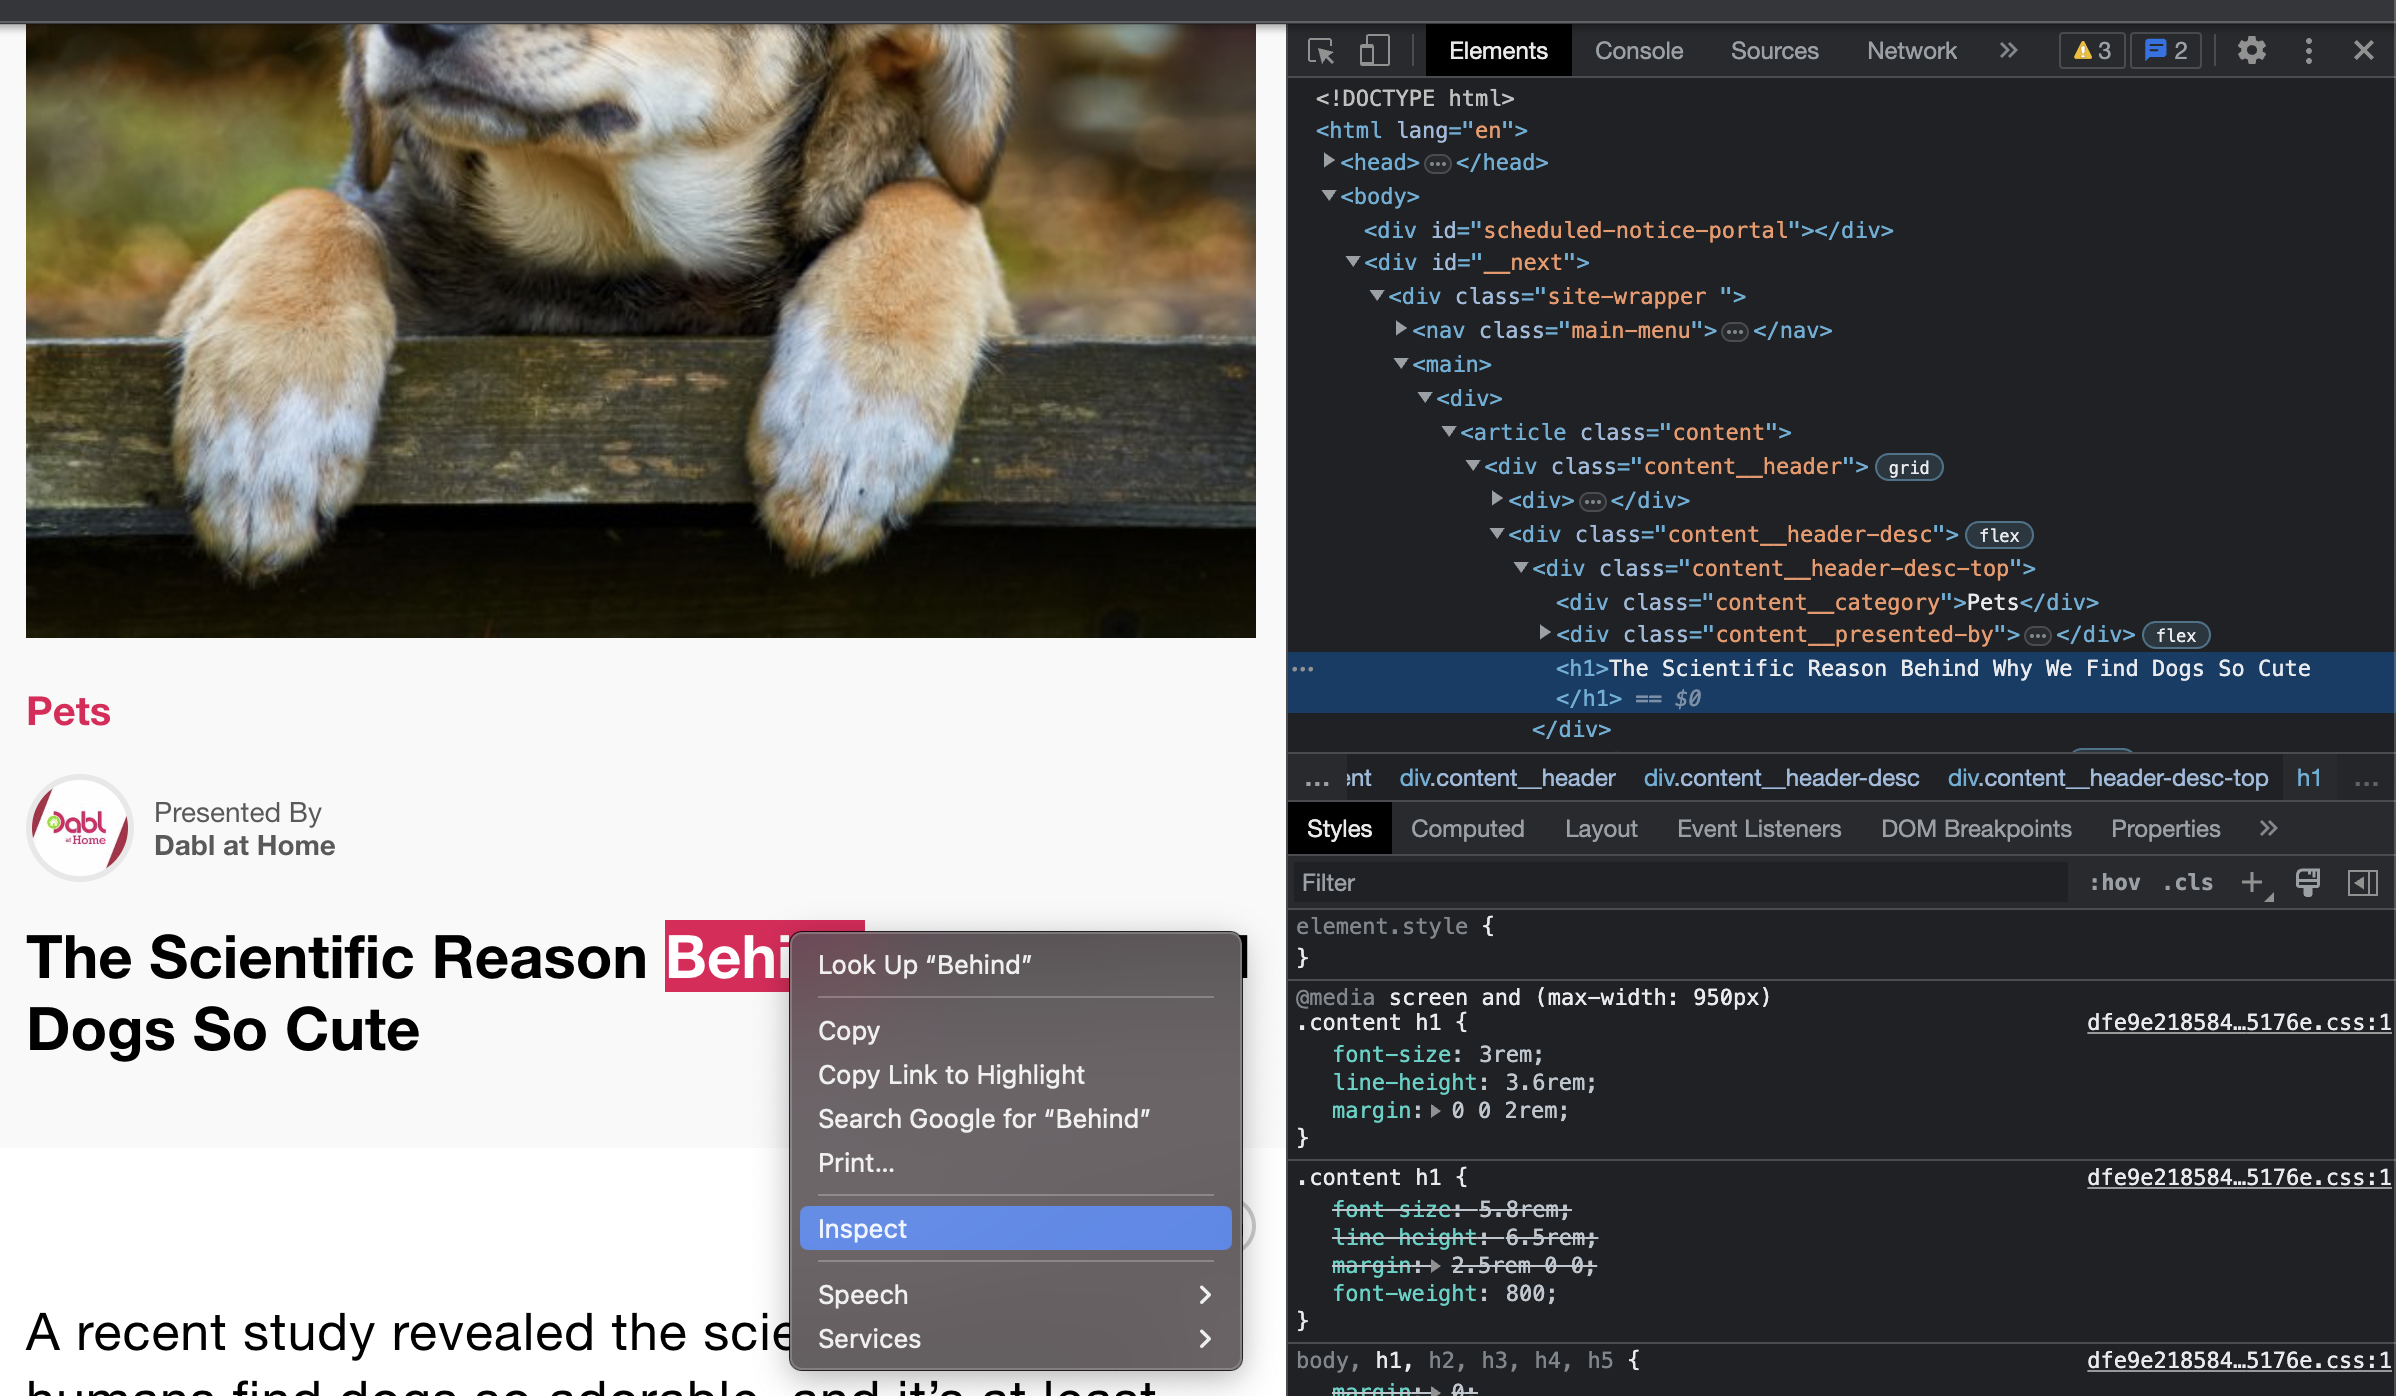
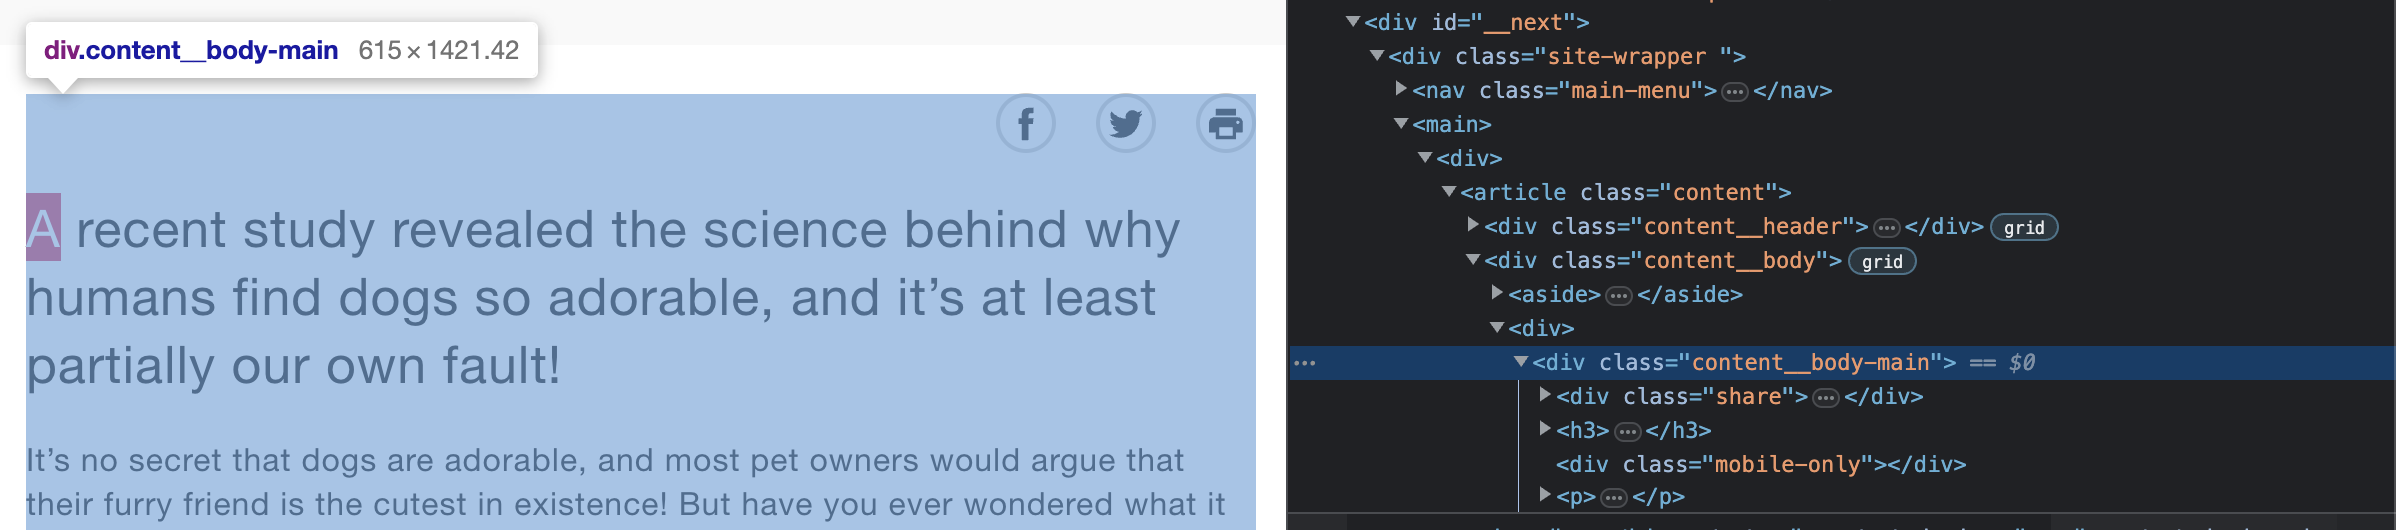
In order to access the various parts of the page, we first must find out something about them, some class name or id by which to pull the data out of the overall HTML data via Beautiful Soup. As is often the case, the main heading or title of an article will be tagged as <h1> in the HTML data, and this web page follows that pattern. We can see this by selecting a section of the page, right clicking, and selecting Inpsect from the dropdown menu in the browser.
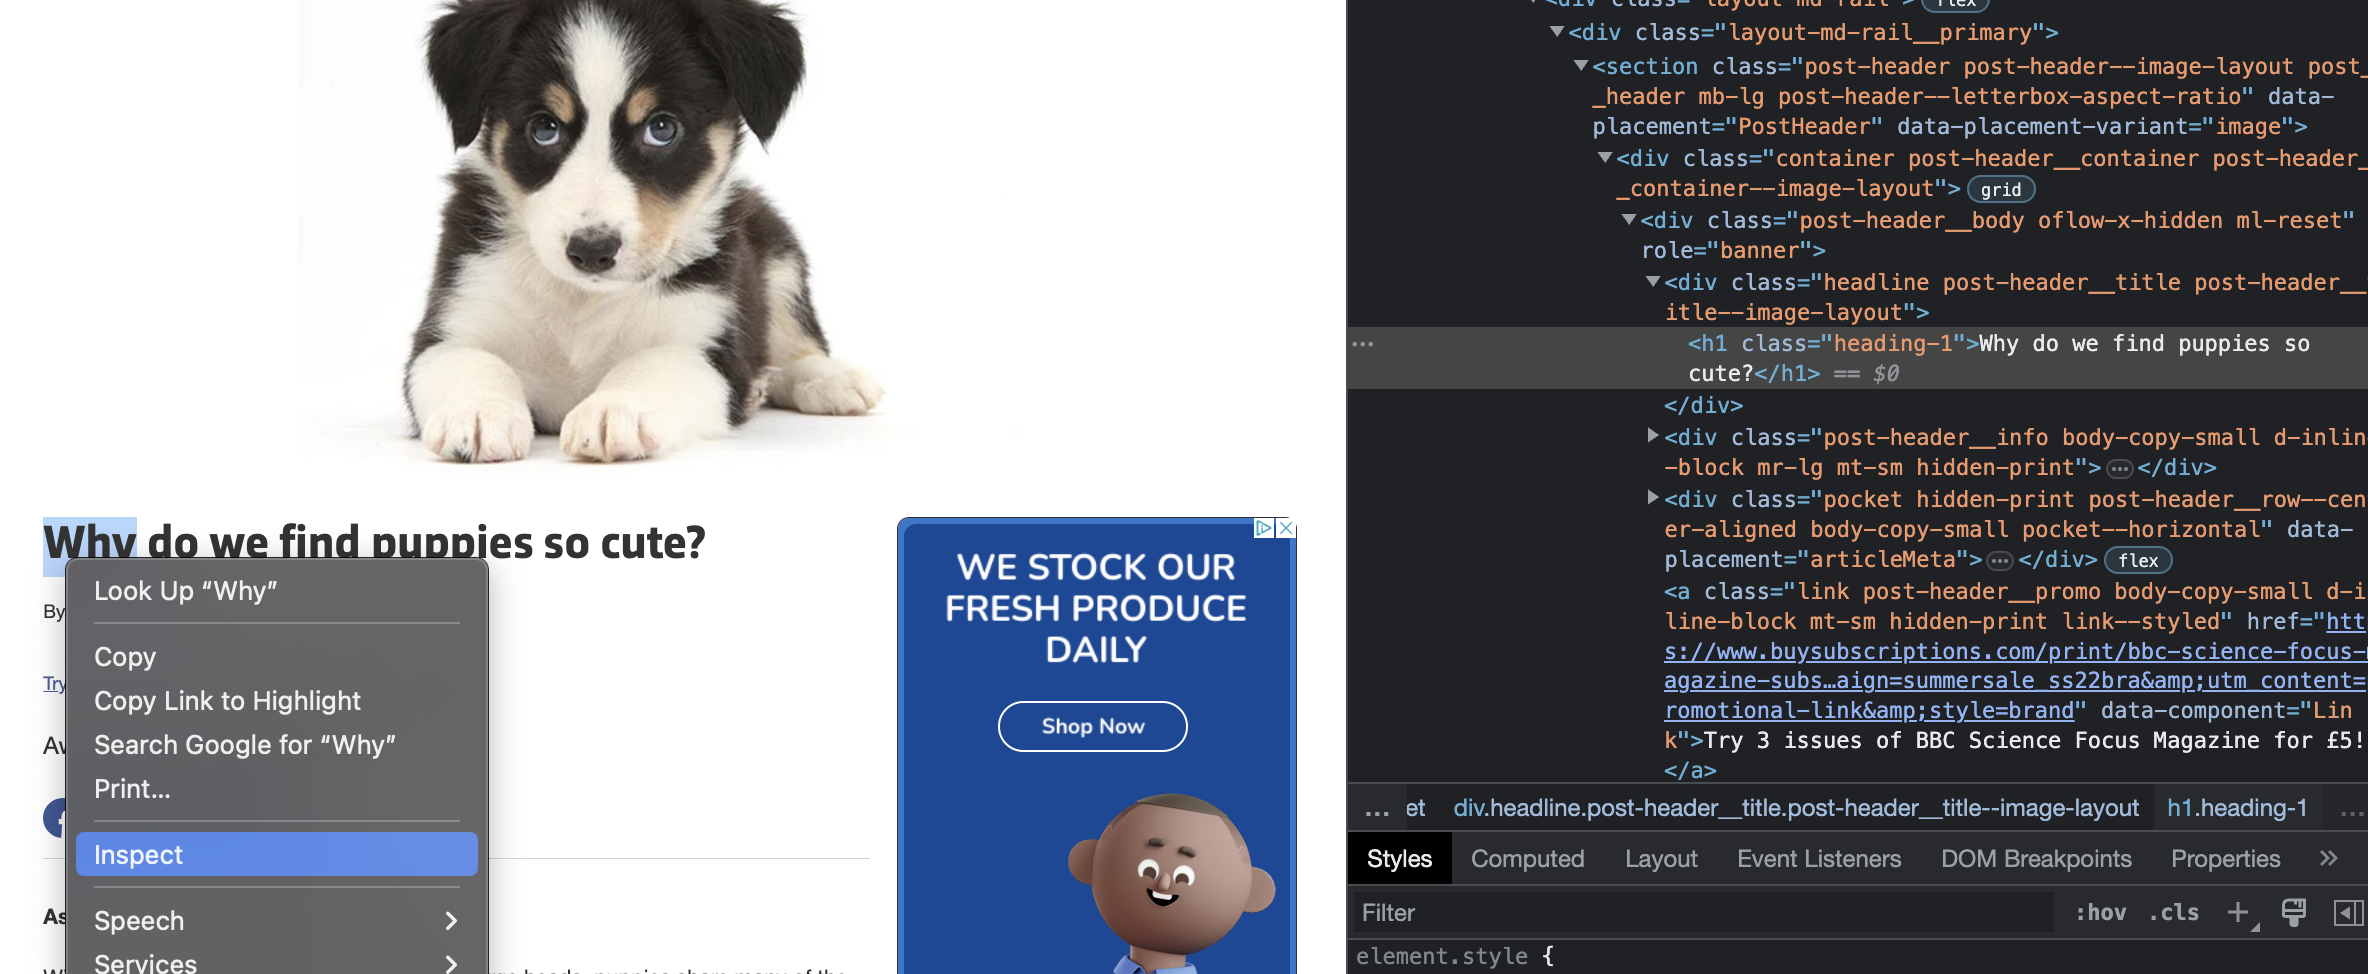
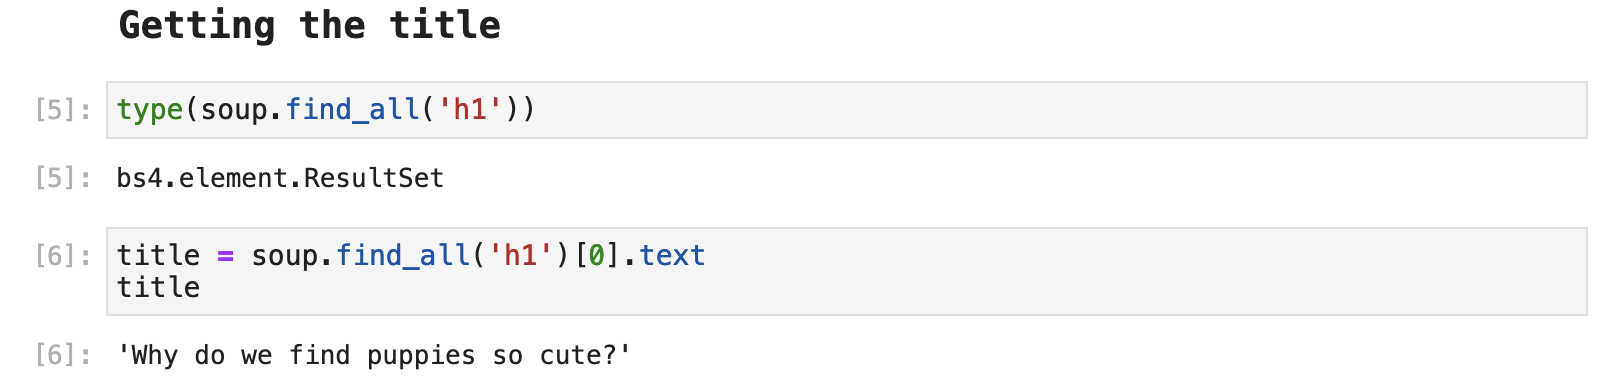
When we bounce back over to our code, all we have to do is use the soup.find_all() method and pass h1. This will return any data tagged as h1 in the HTML. When only one item is present under a tag, we still must index using [0] to access that item. And then we use the text attribute to retrieve the text from the webpage that was tagged as h1. And, voilá, we have our title.
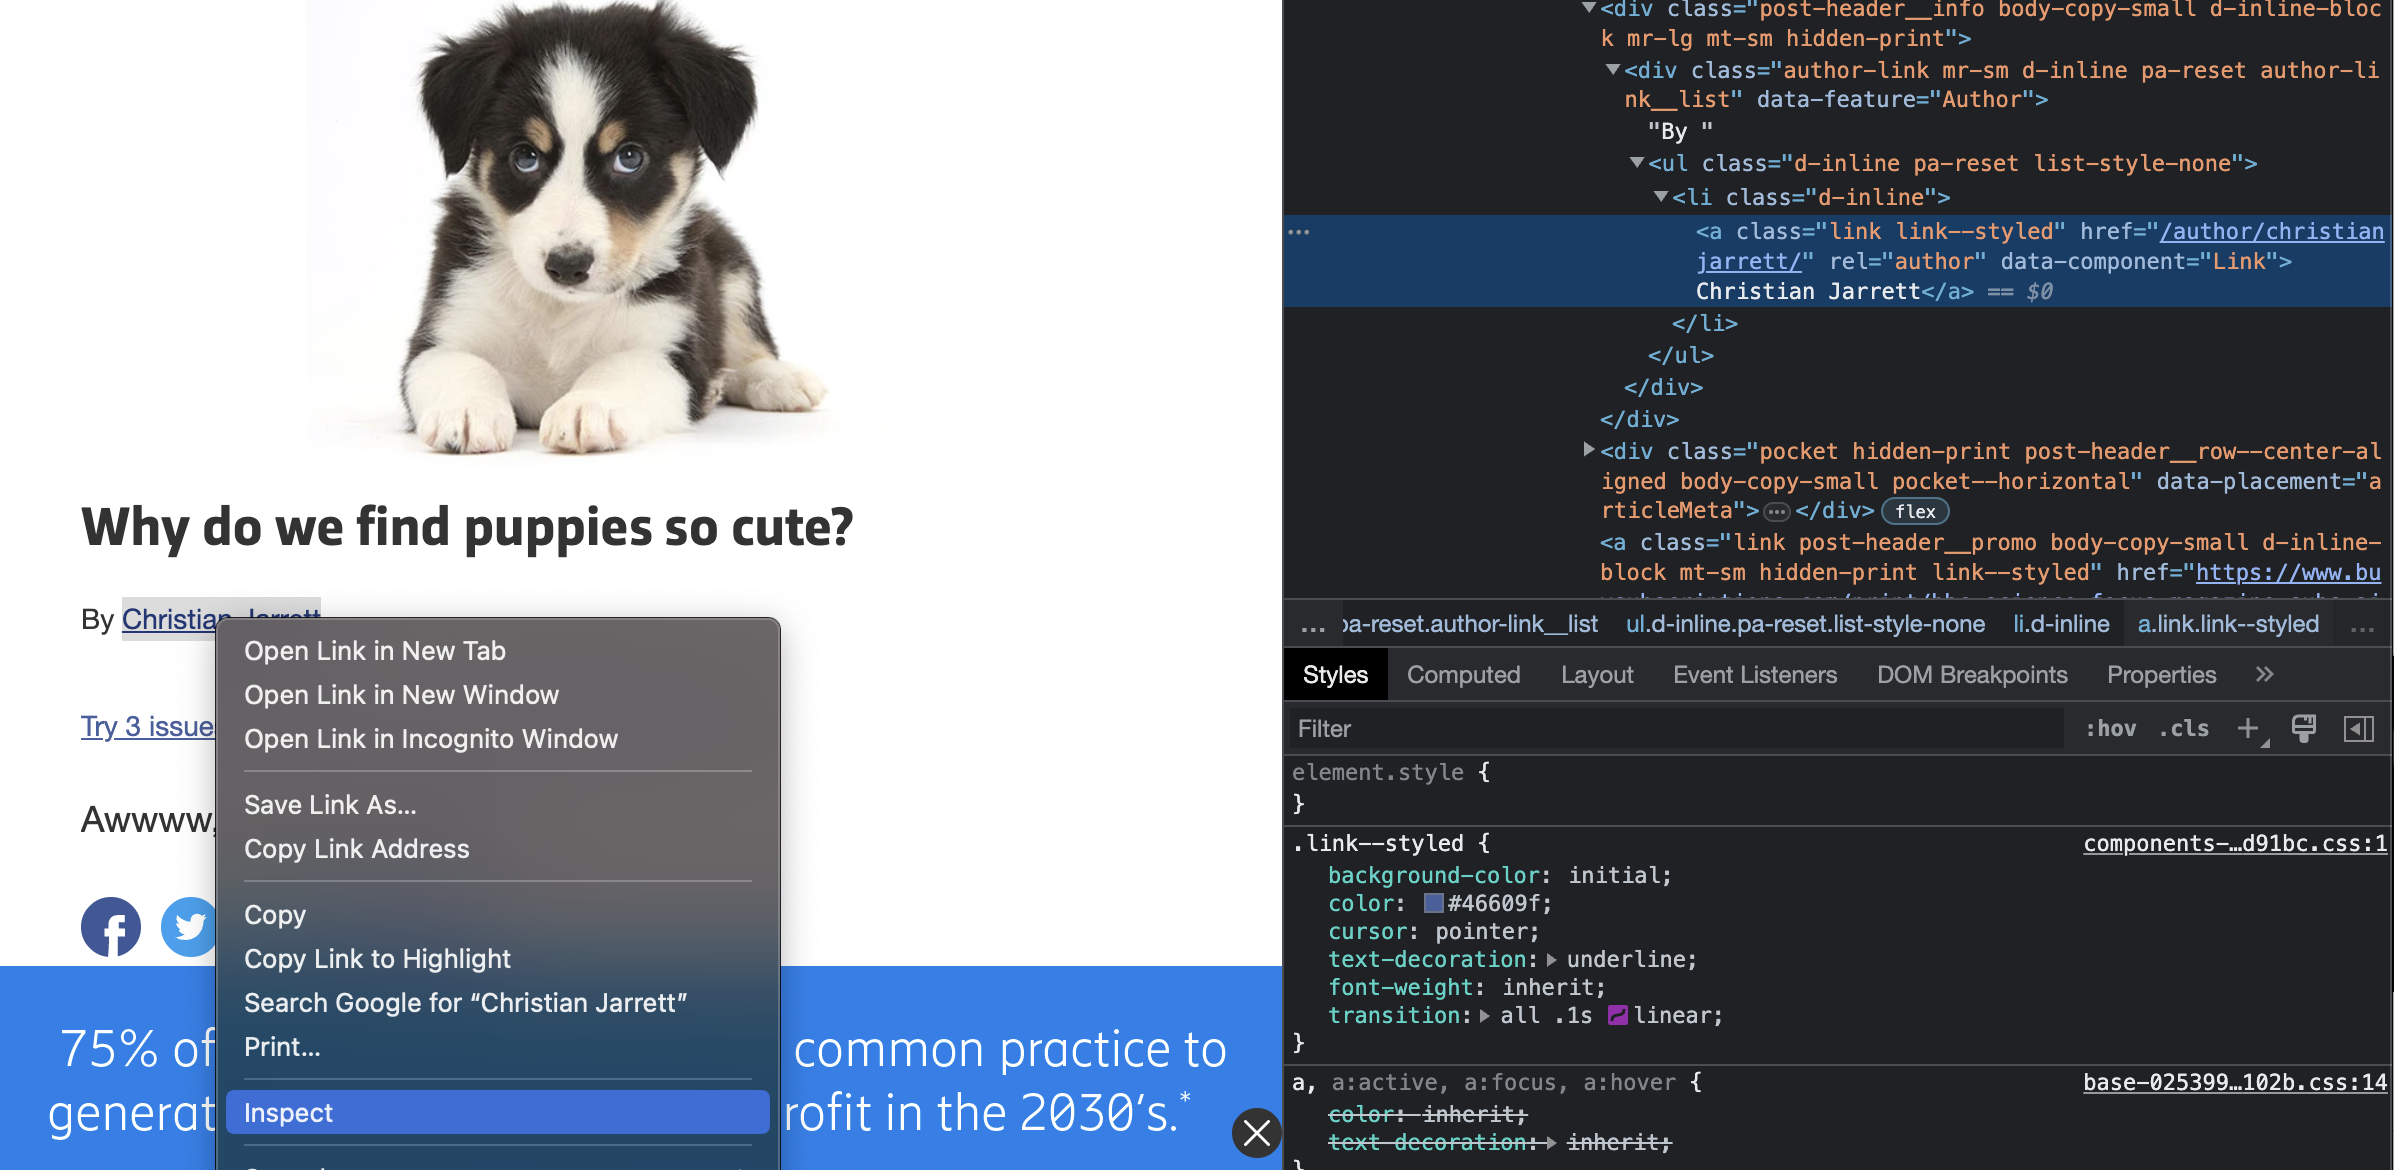
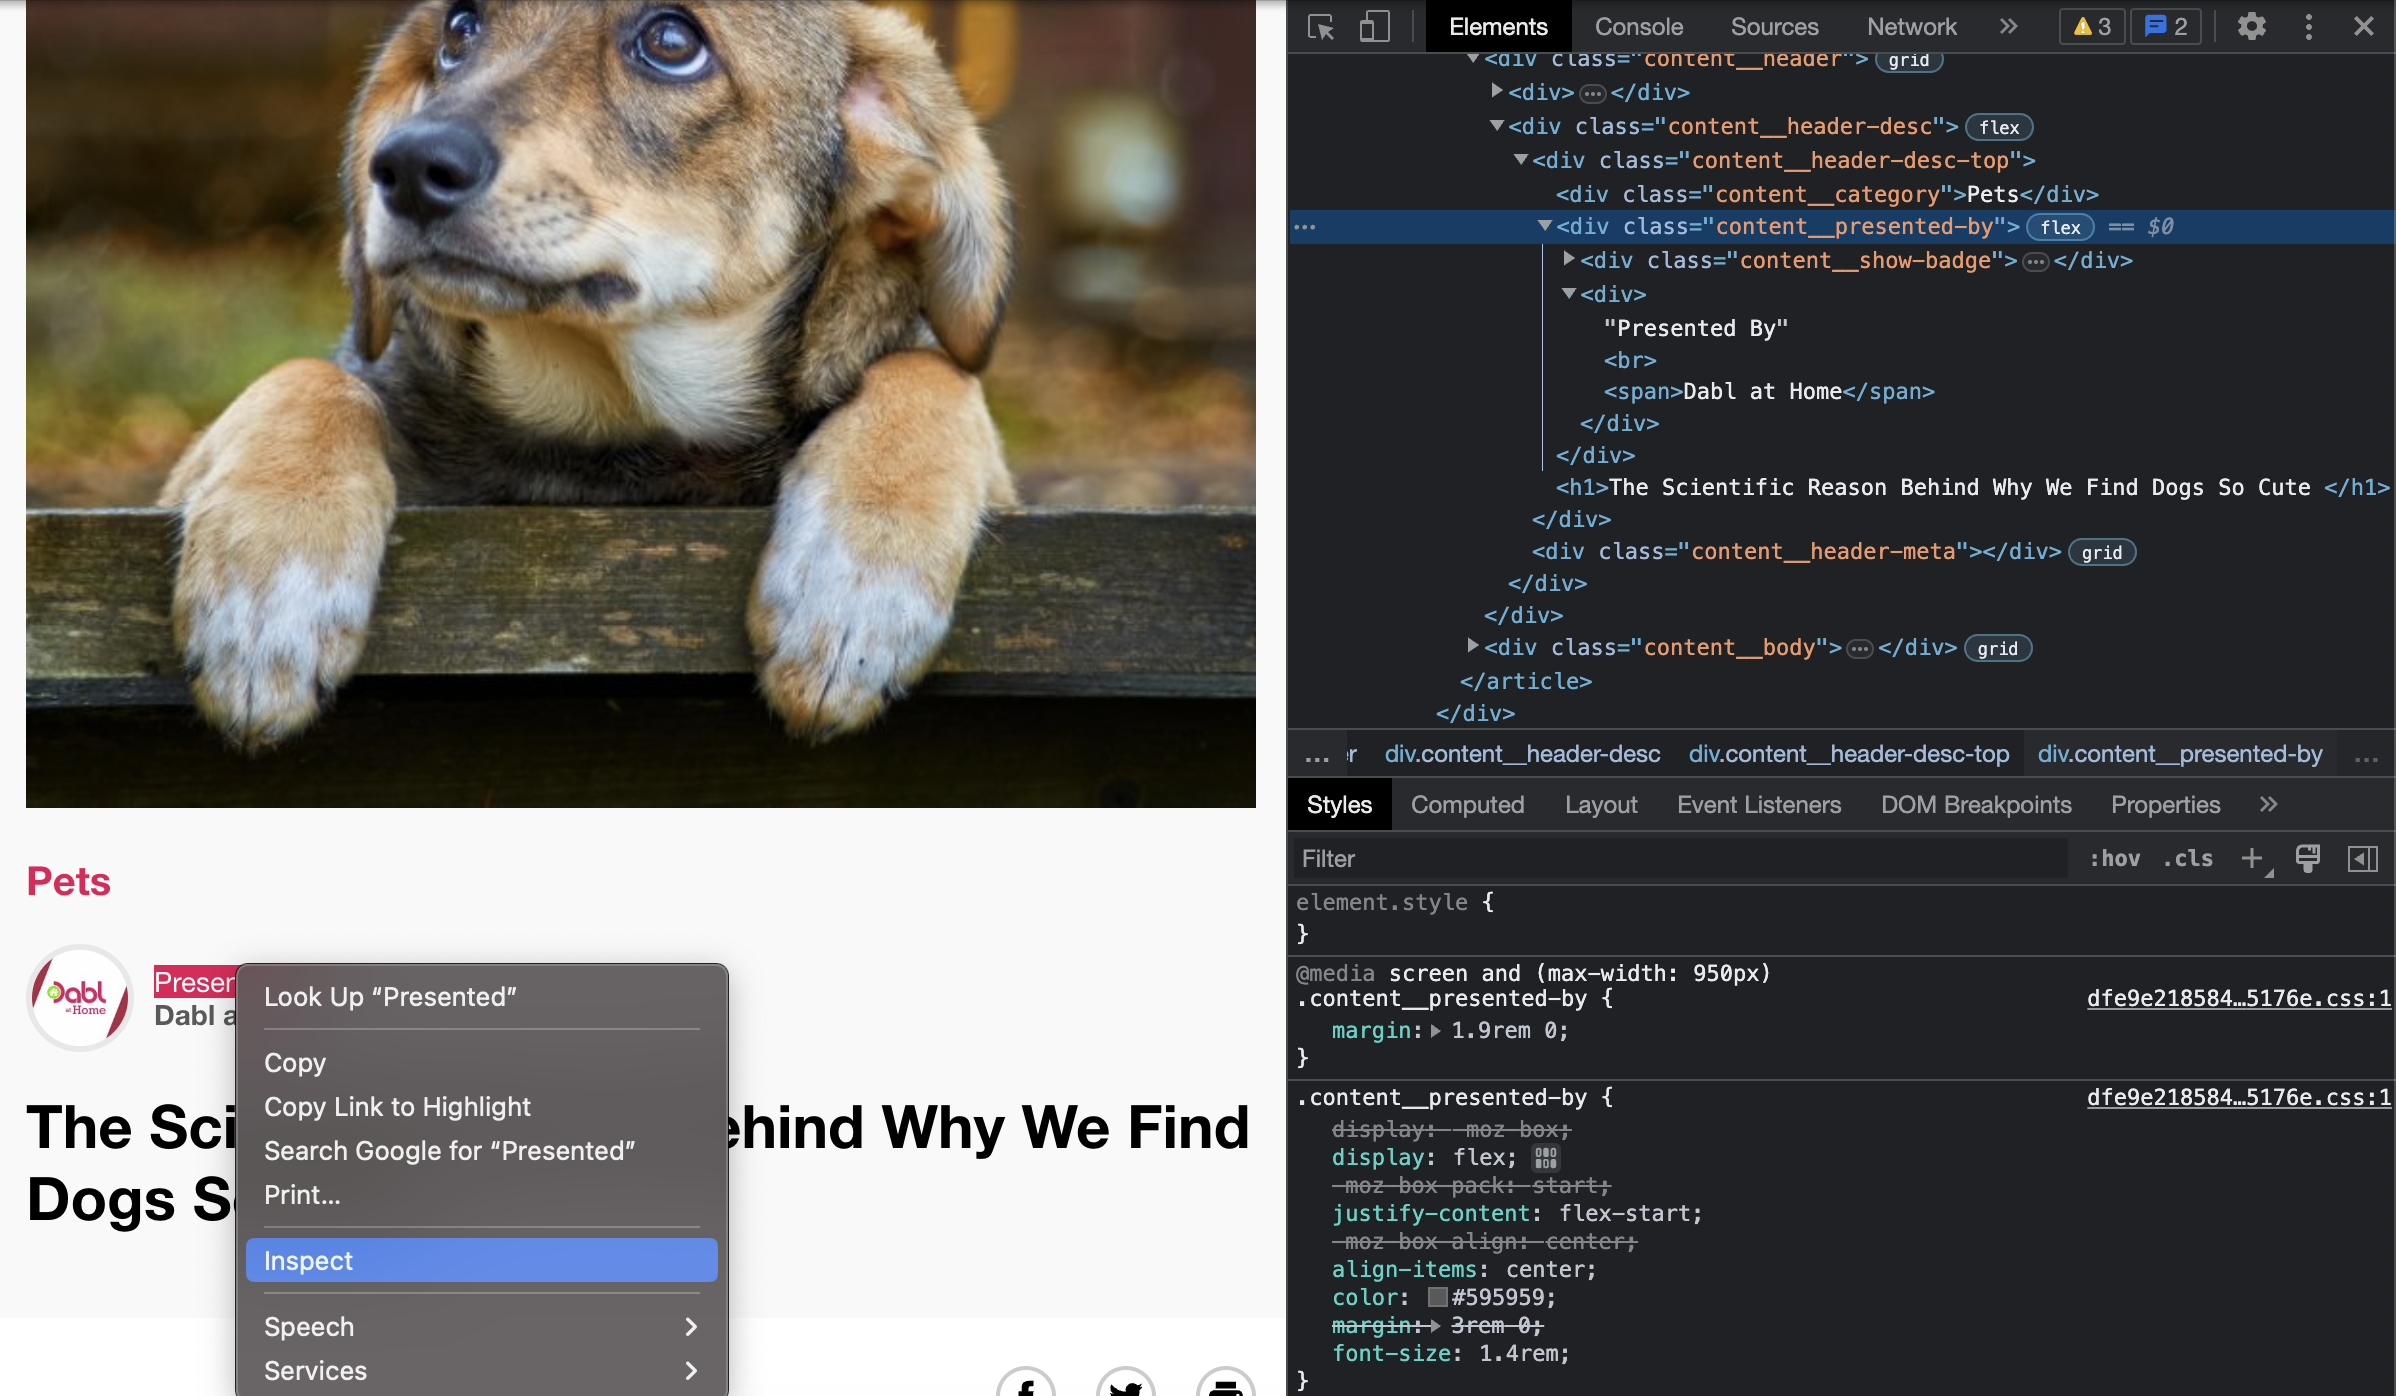
Next, we are looking for the author. This is where things often become much more unique from one web source to another, if not even before this. Here when we right click on the author's name and select Inspect, we find that the author is a part of an section labeled a, or a link, and its class label is link link --styled.
So we can once again use this unique tagging to grab this bit of data in Beautiful Soup.

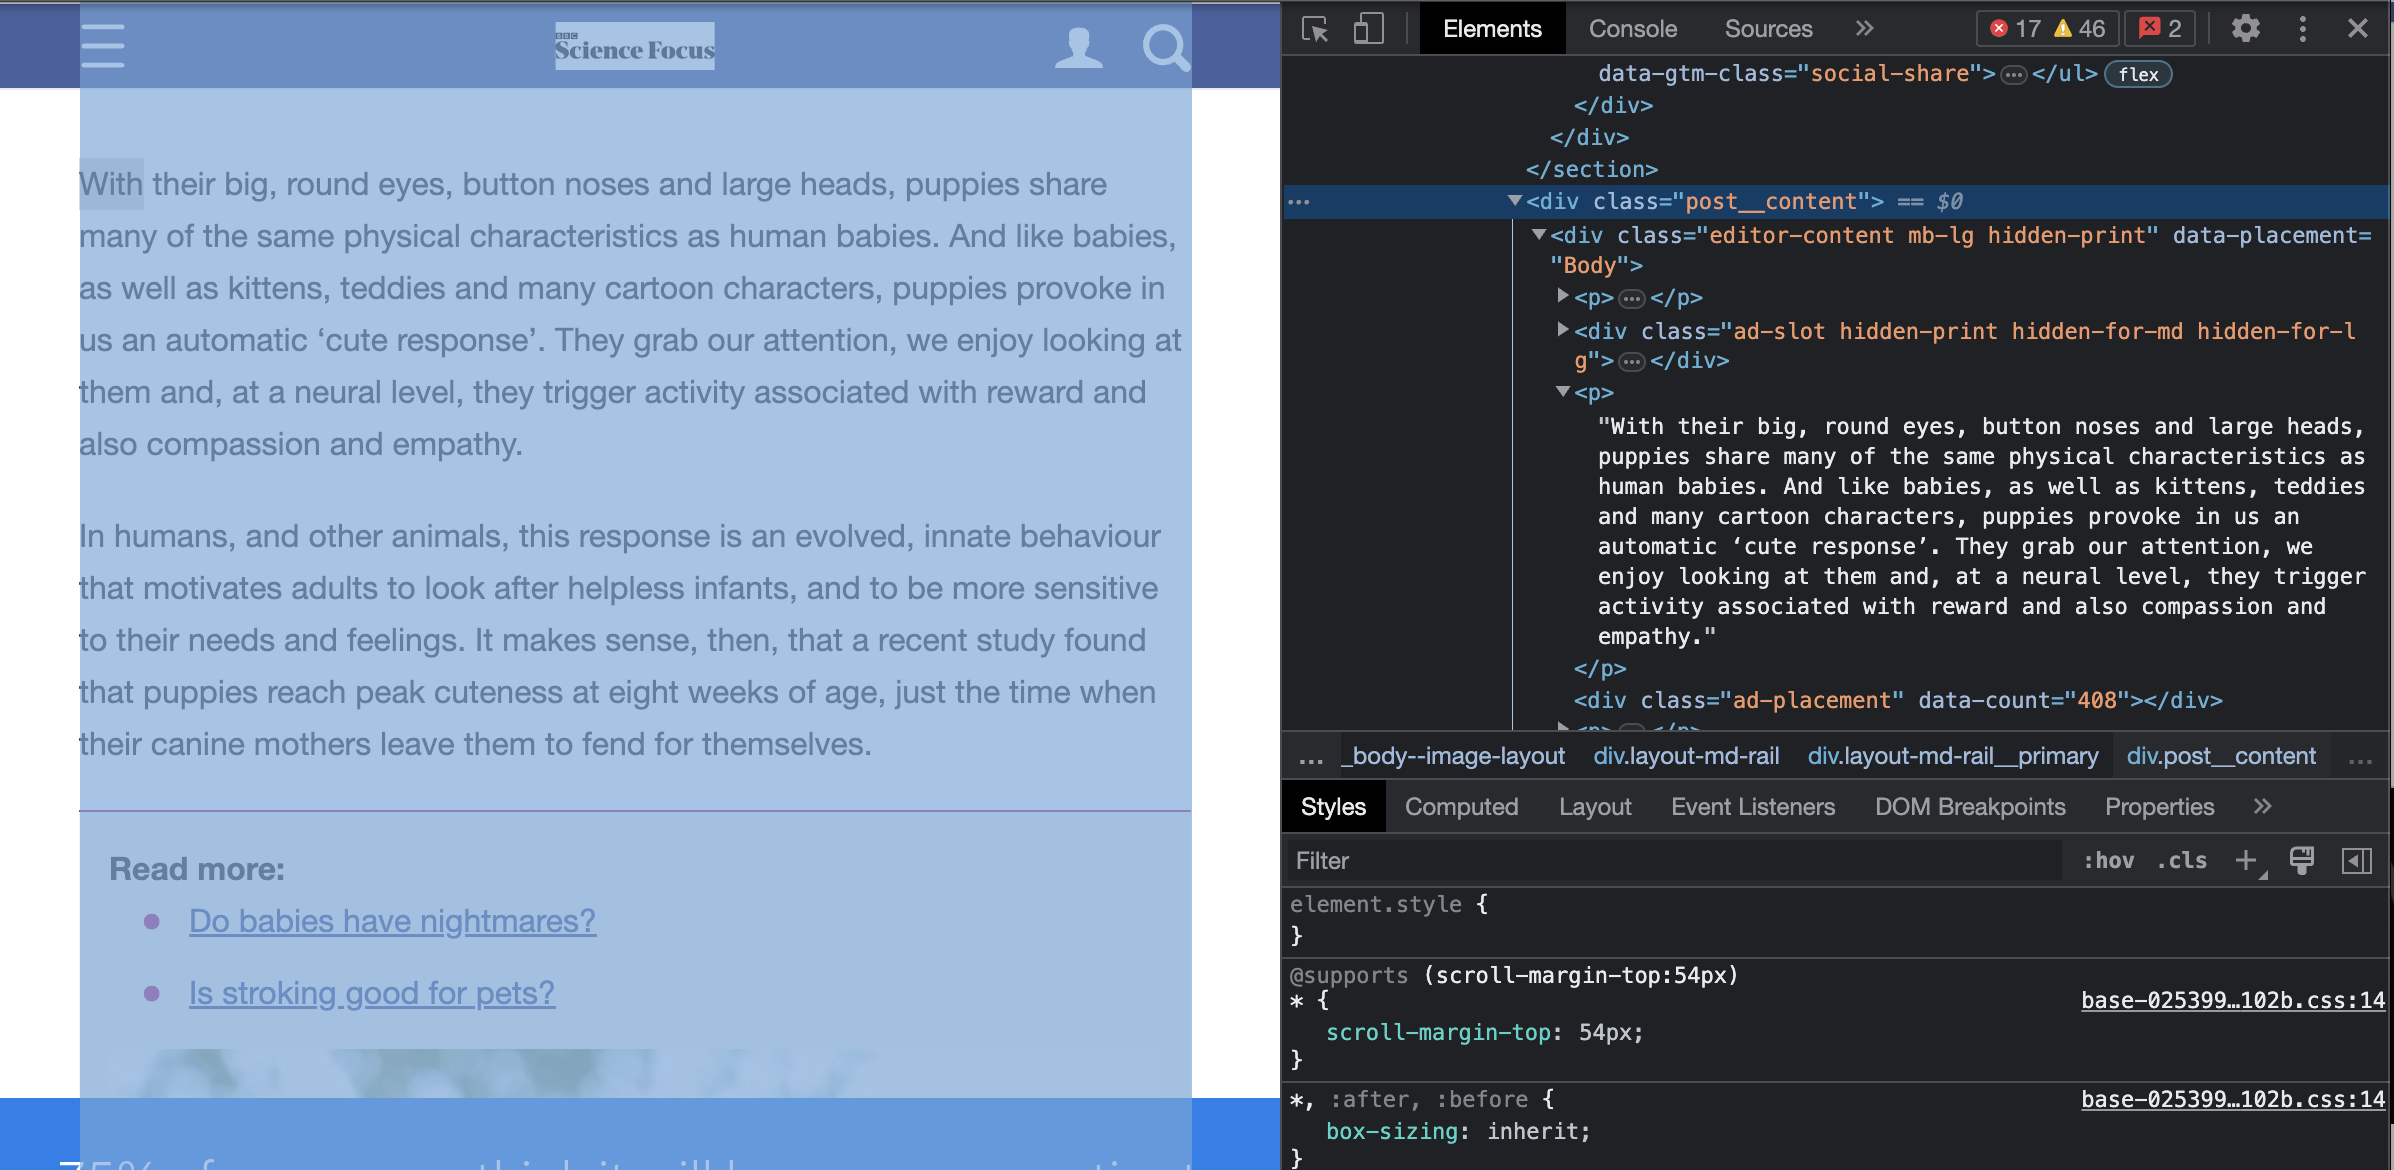
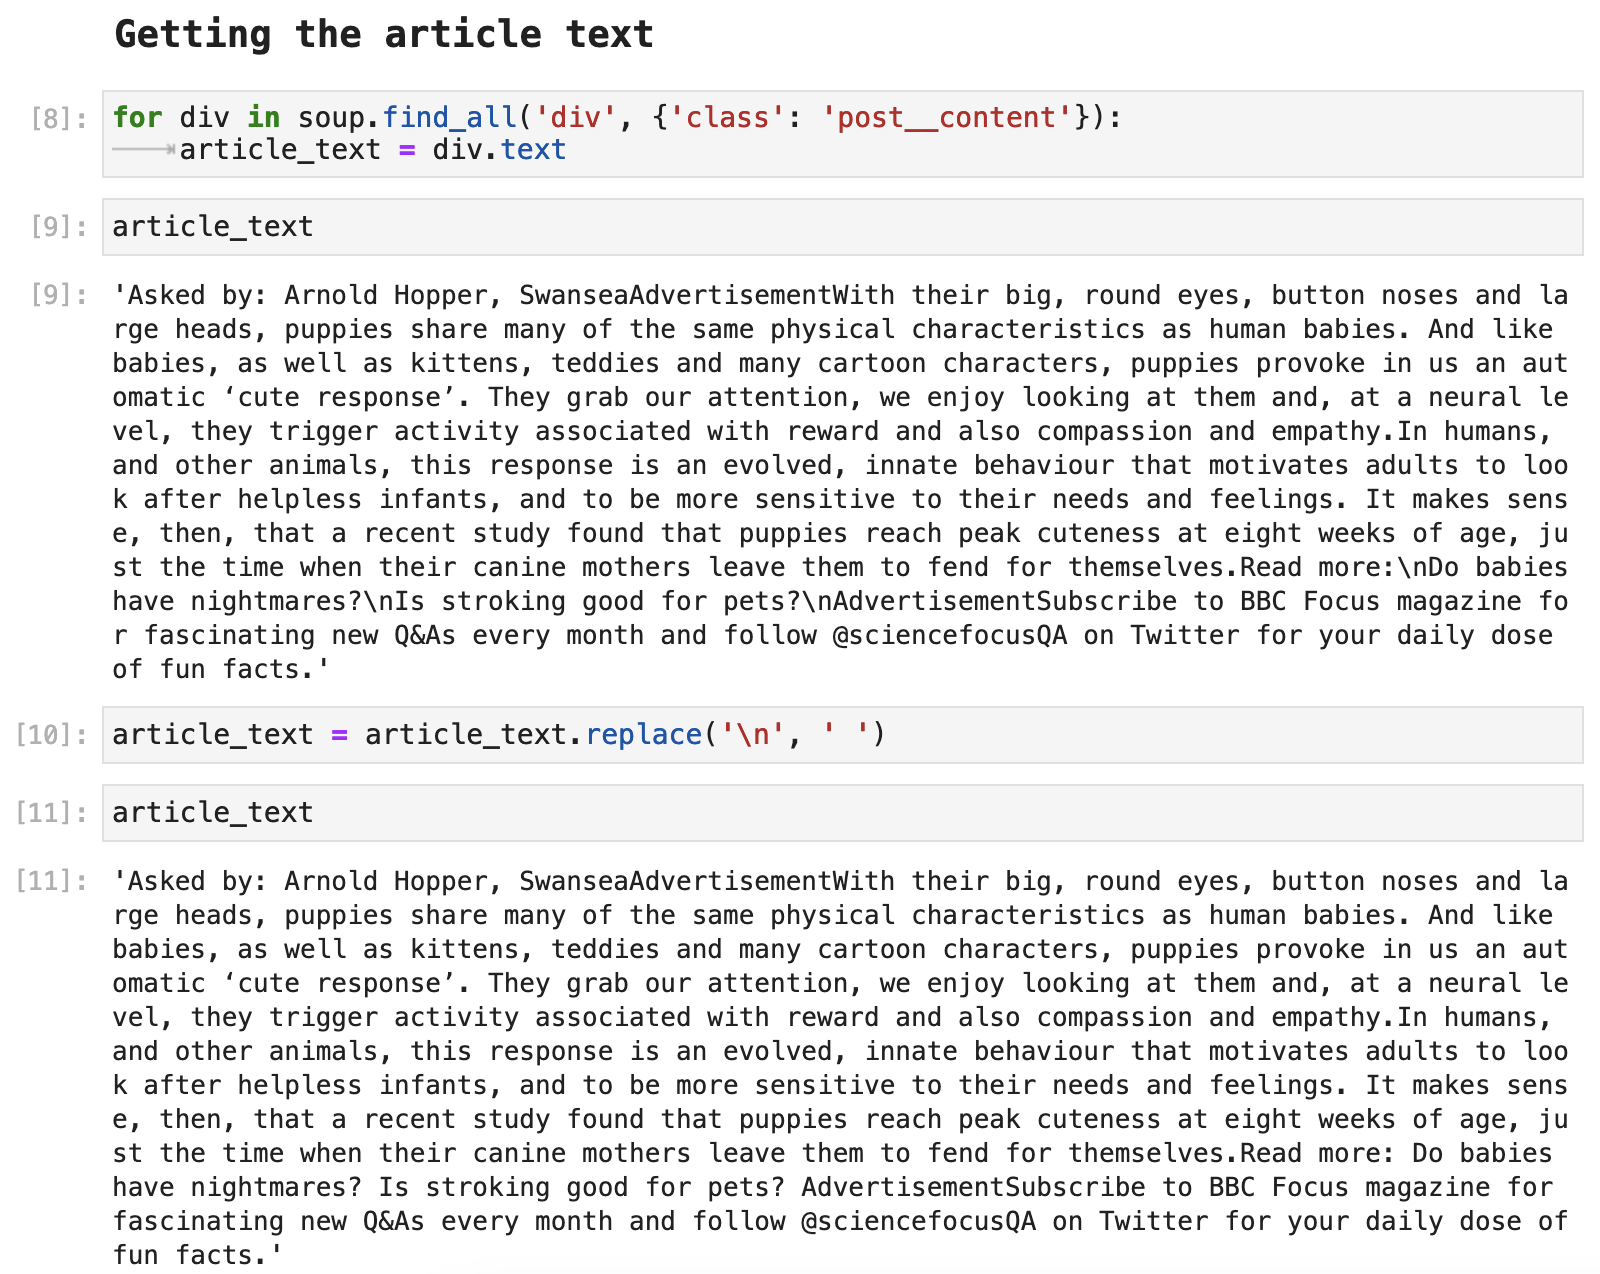
Now on to the article text. This part can often get extra messy, depending on how many advertisements or other sections are thrown in as is customary in far too many websites these days. Thankfully, this example is very clean and gives us only the data we actually want for the most part. And it is all nicely structured under a div in the HTML with the class name post__content. How convenient!
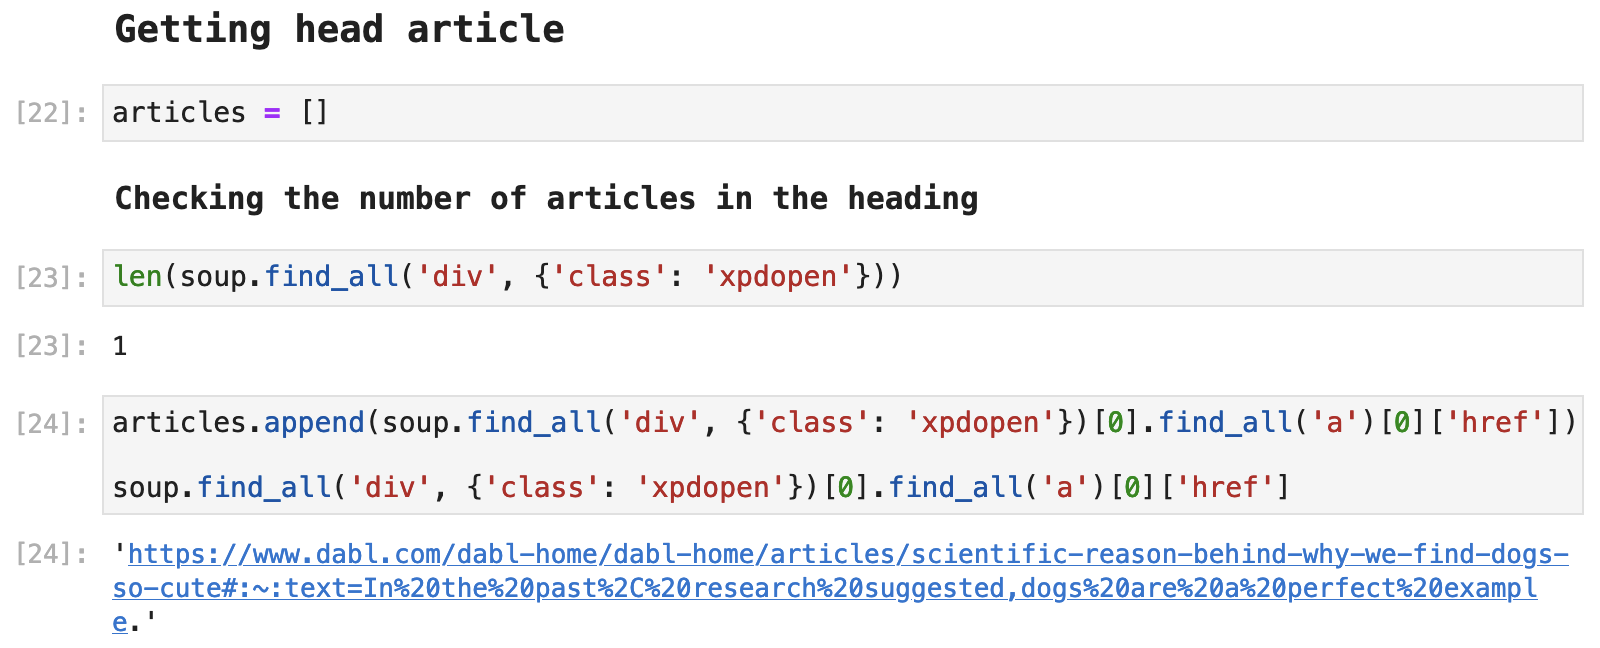
The following is another way sections within Beautiful Soup results are often accessed, using a for-loop to grab a part one section of the Beautiful Soup results. Once again, there is only one section within the div, and the part we are interested in is the text attribute of that section. Then with a little bit of string replacement cleanup, we have a nice, neat article text as a paragraph.
Expanding to a Google Search
Suppose you want to take this a few steps further and perform an actual Google search in your code and then scrape results from that search. With just a couple of extra steps, the process is essentially just as simple and easy as above. The only difference is that this time, before saving the HTML data from the attribute driver.page_source, we have to interact with Google a bit.
First, we have to access the search bar so that we can provide a query input:
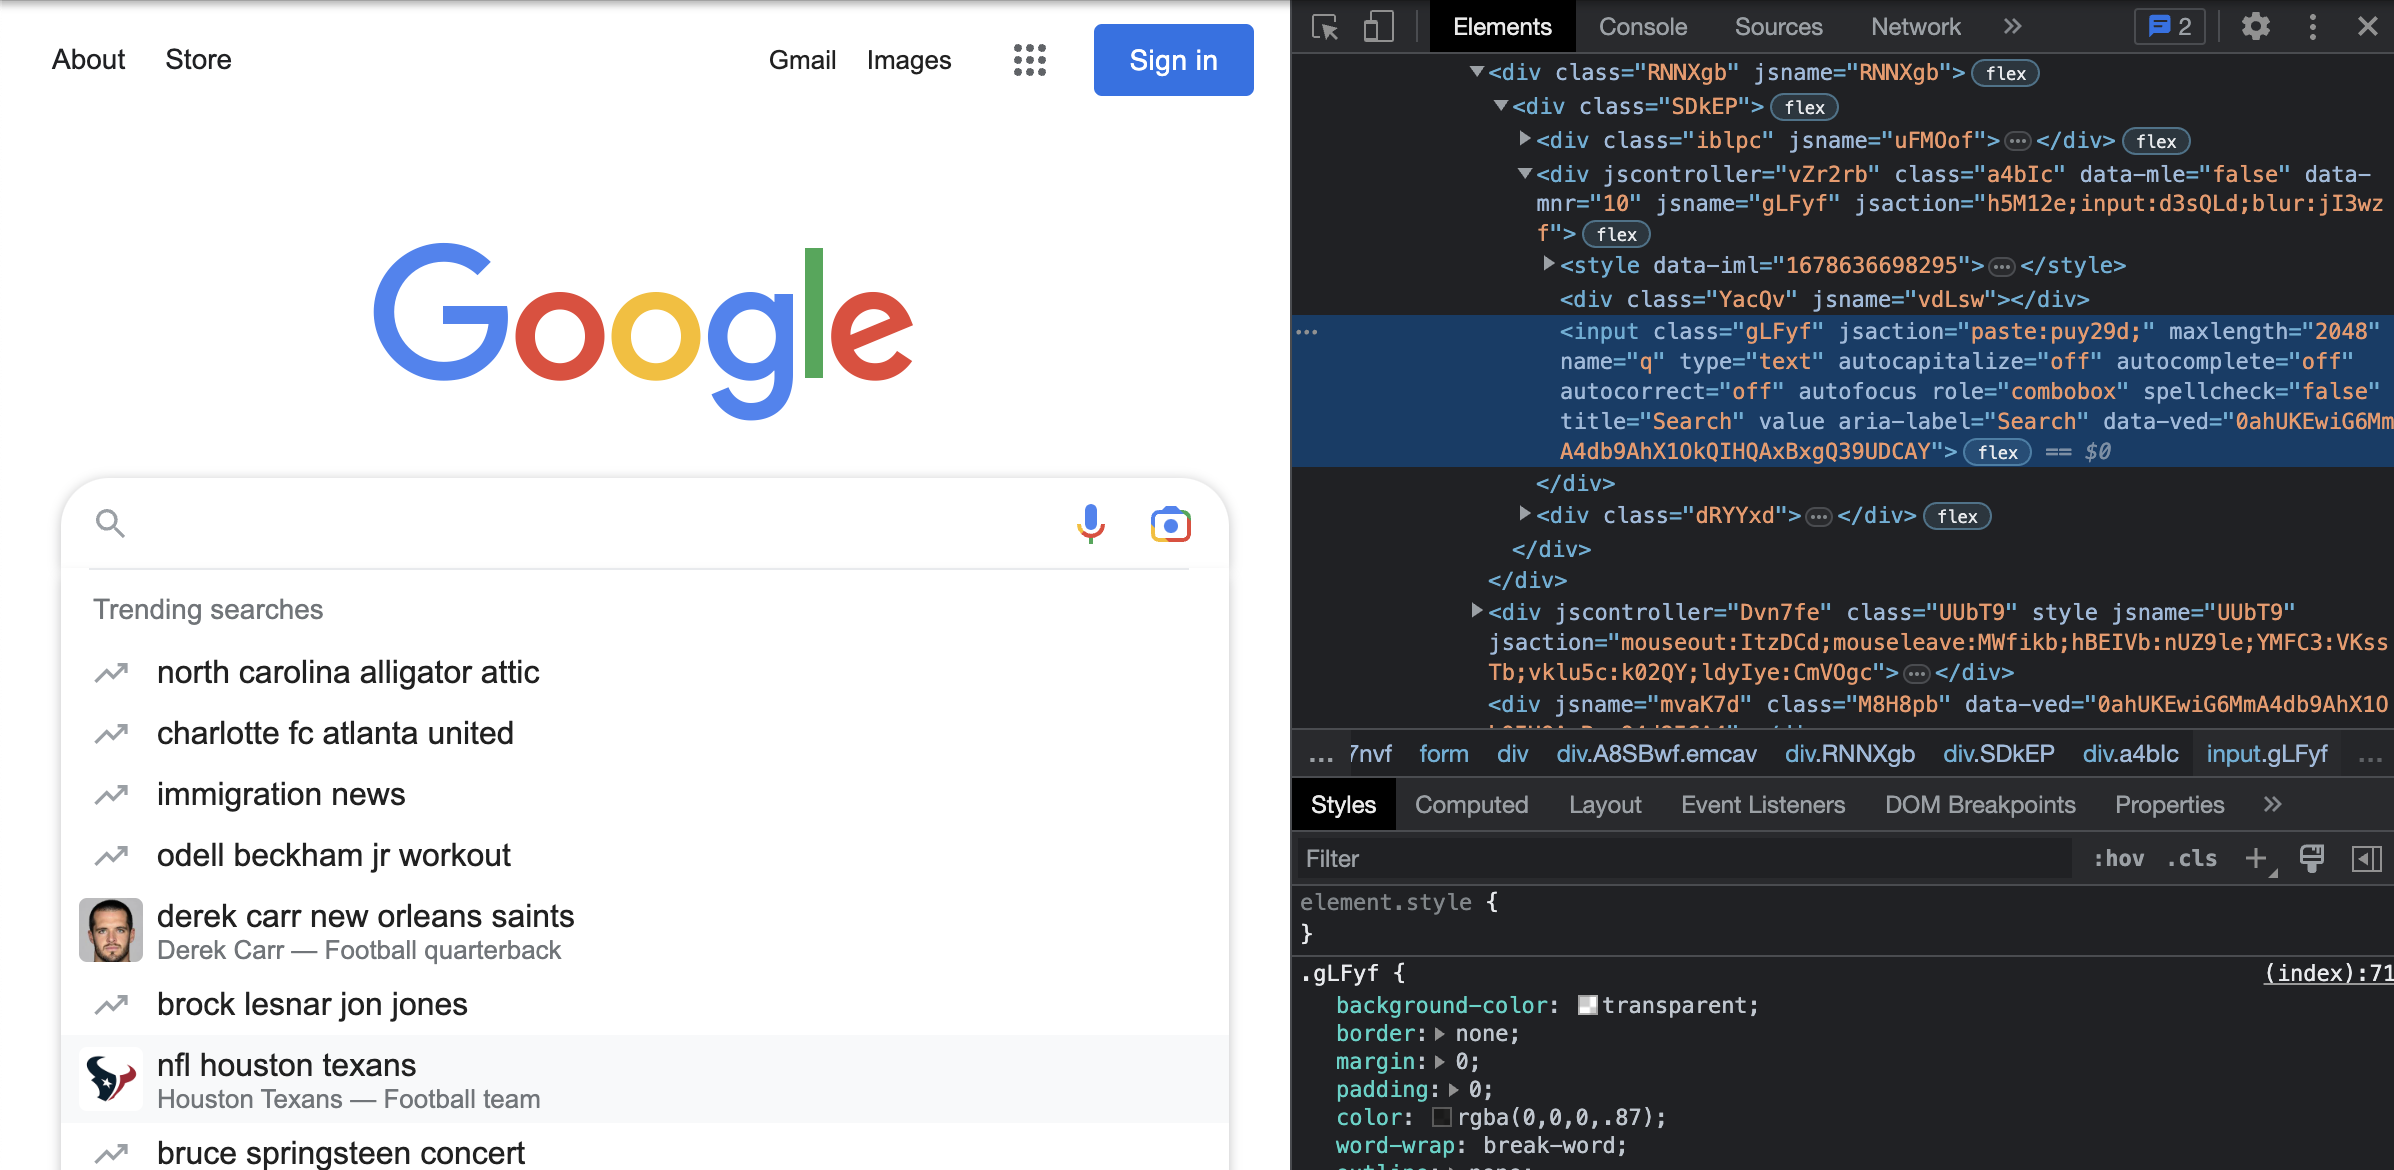
Then we have to input our query to Google.
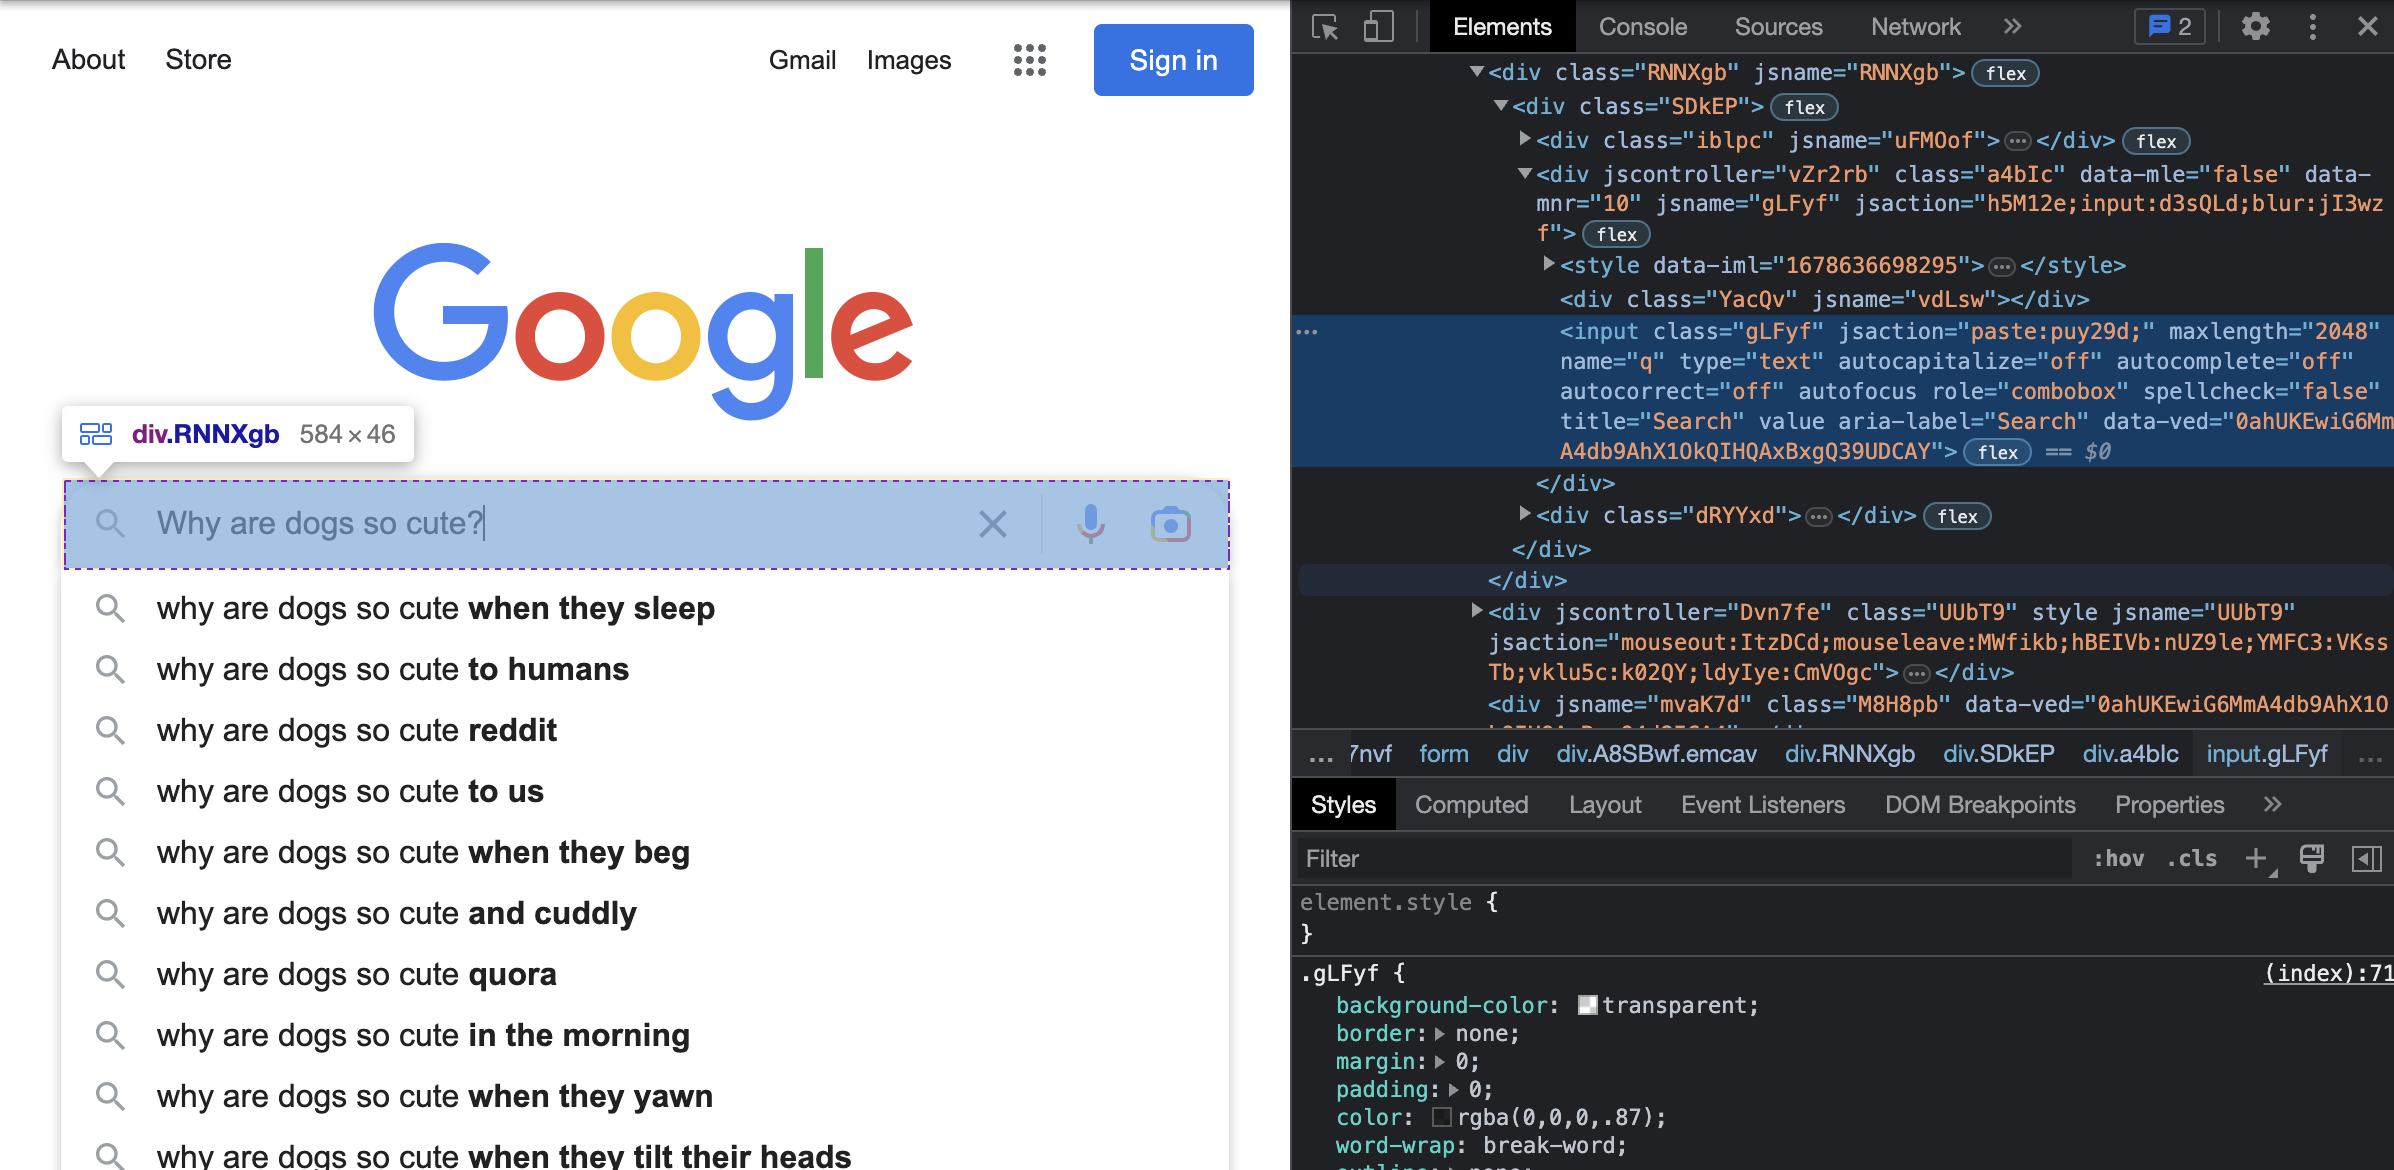
So here is what that looks like in code. Above we saw that the search bar is labeled with the name q. How nice and simple! So we use the webdriver in Selenium to search for the element, which we are selecting by its NAME, and the name is q.
Next, to that field, we send_keys(), which is just us sending our query phrase: "Why are dogs so cute?" And then we once again use send_keys() but this time to click ENTER so that our search is sent to Google. And we get our results.
We then, as before, save our HTML data by calling driver.page_source and saving it as the variable html_data. Then time to soupify - we turn this into a wonderful little soup with Beautiful Soup.

Now that we have our search results, we get to dive into the depths of Google's HTML structure. One thing you will notice is that class names and other ways of labeling and tagging divs is randomized and a bit sticky. So we have to get creative here. One thing we can observe is that each of the titles of the articles returned in this search is tagged as <h3>. We can use that tag to grab all fo the titles.
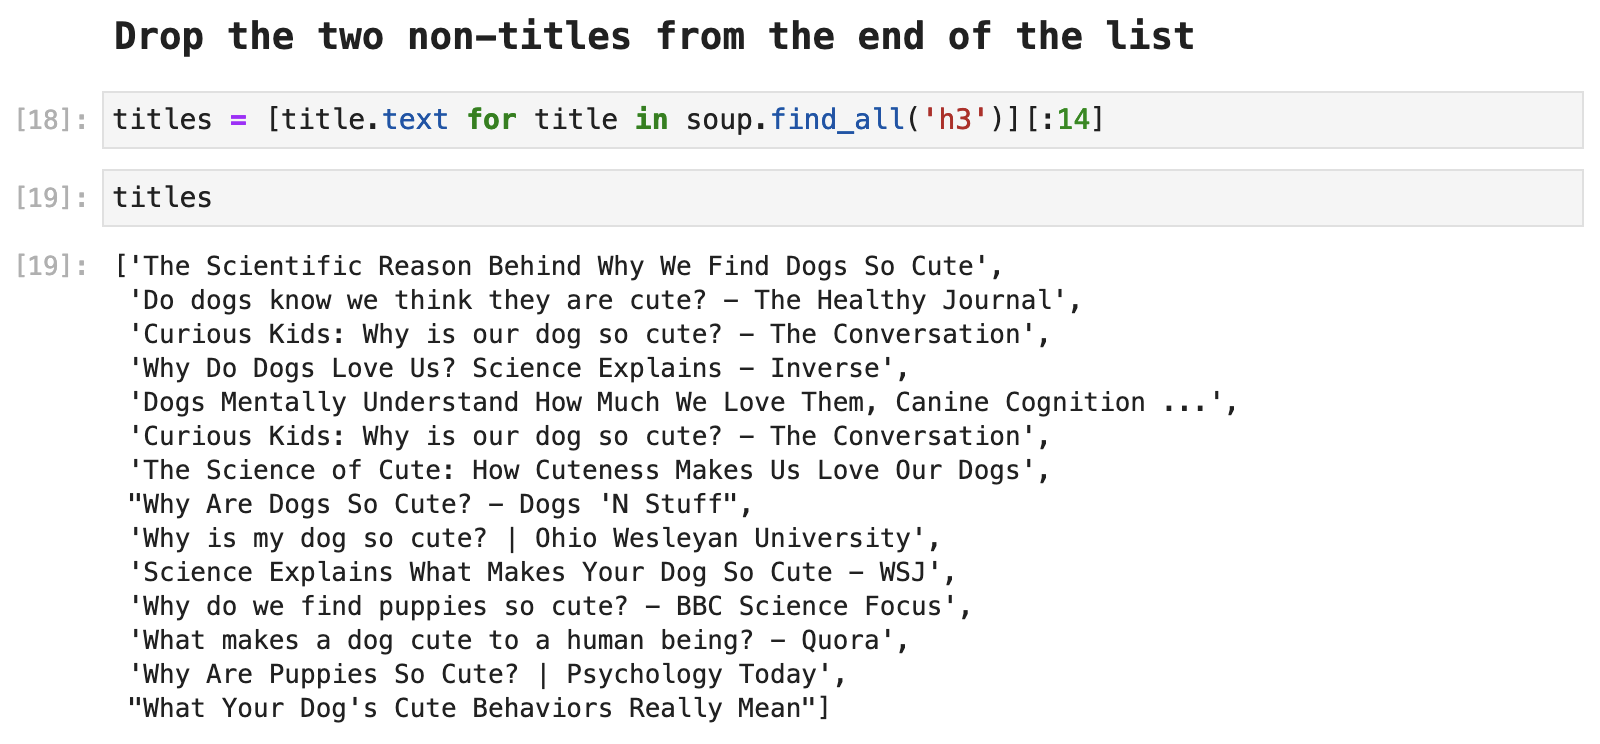
Having grabbed all of the titles, we see that we have some stowaways that are not useful data: "More results" and "Try again".
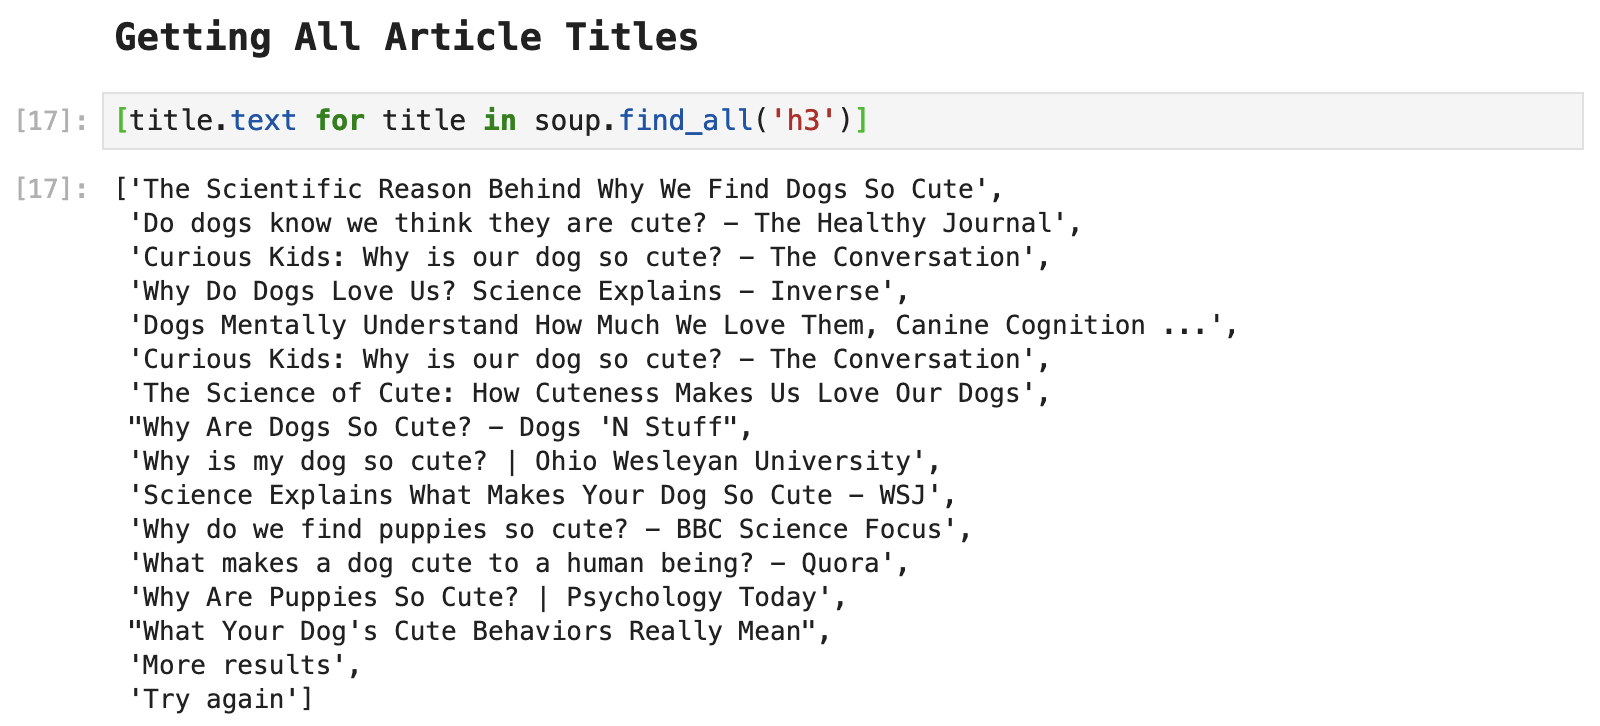
These two must be removed:
Next, one thing Google also likes to do is suggest other related searches, as shown in the following example:
Do dogs know they are cute?
Why are dogs just so cute?
Why do dogs love humans?
Do dogs know that you love them?
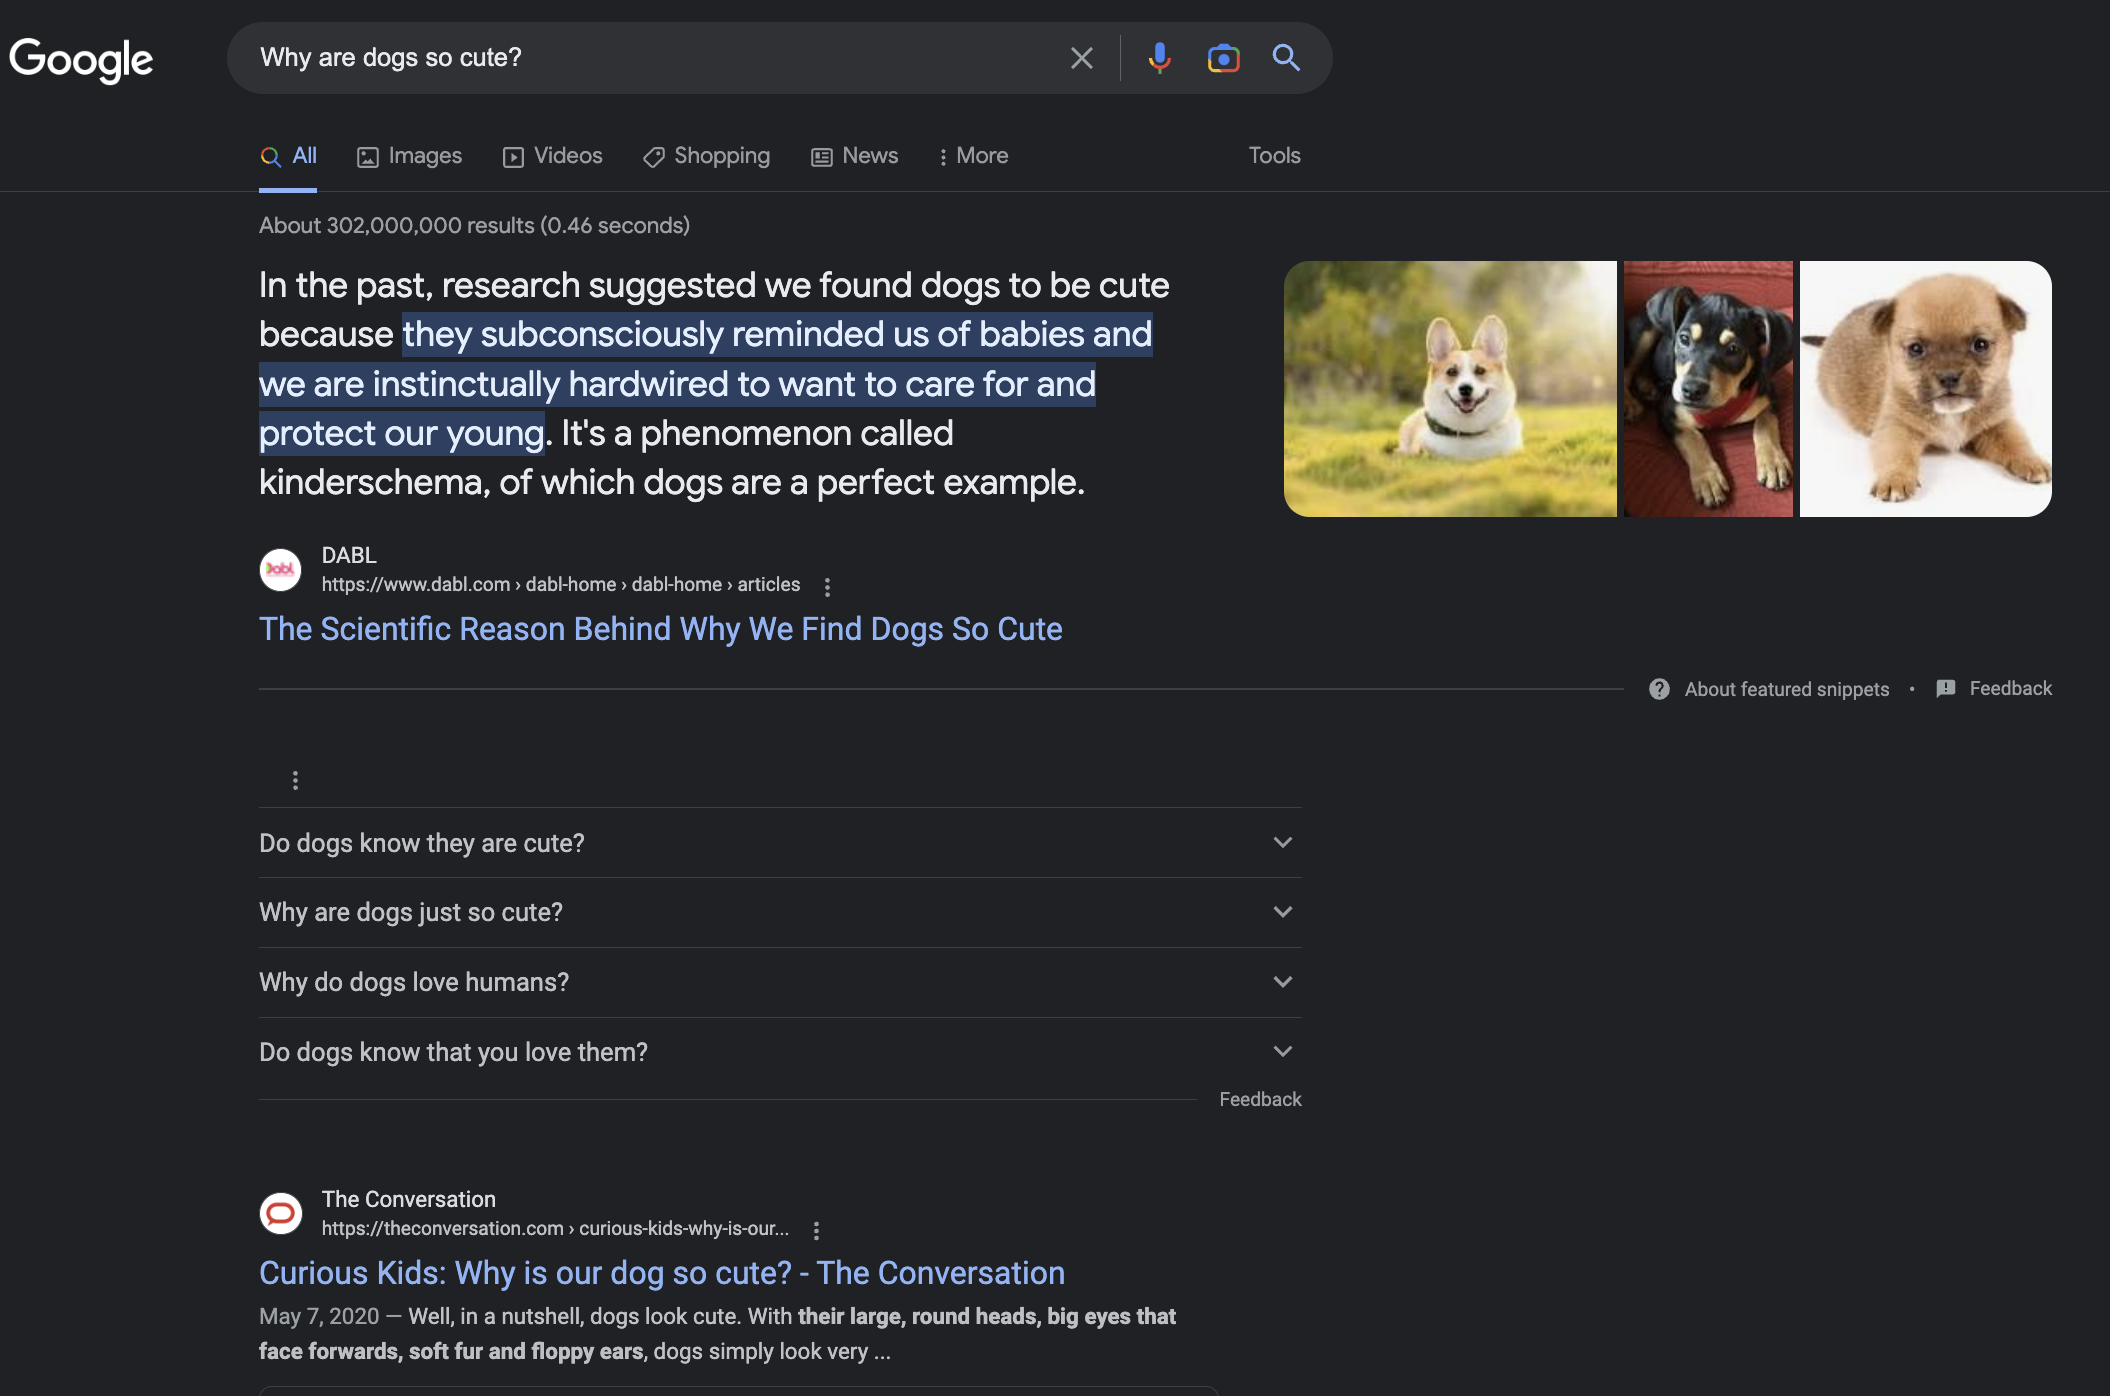
For the purposes of this article, we will be removing these from our list of titles and will be focusing on the 10 search results we get with our first page of results on Google.
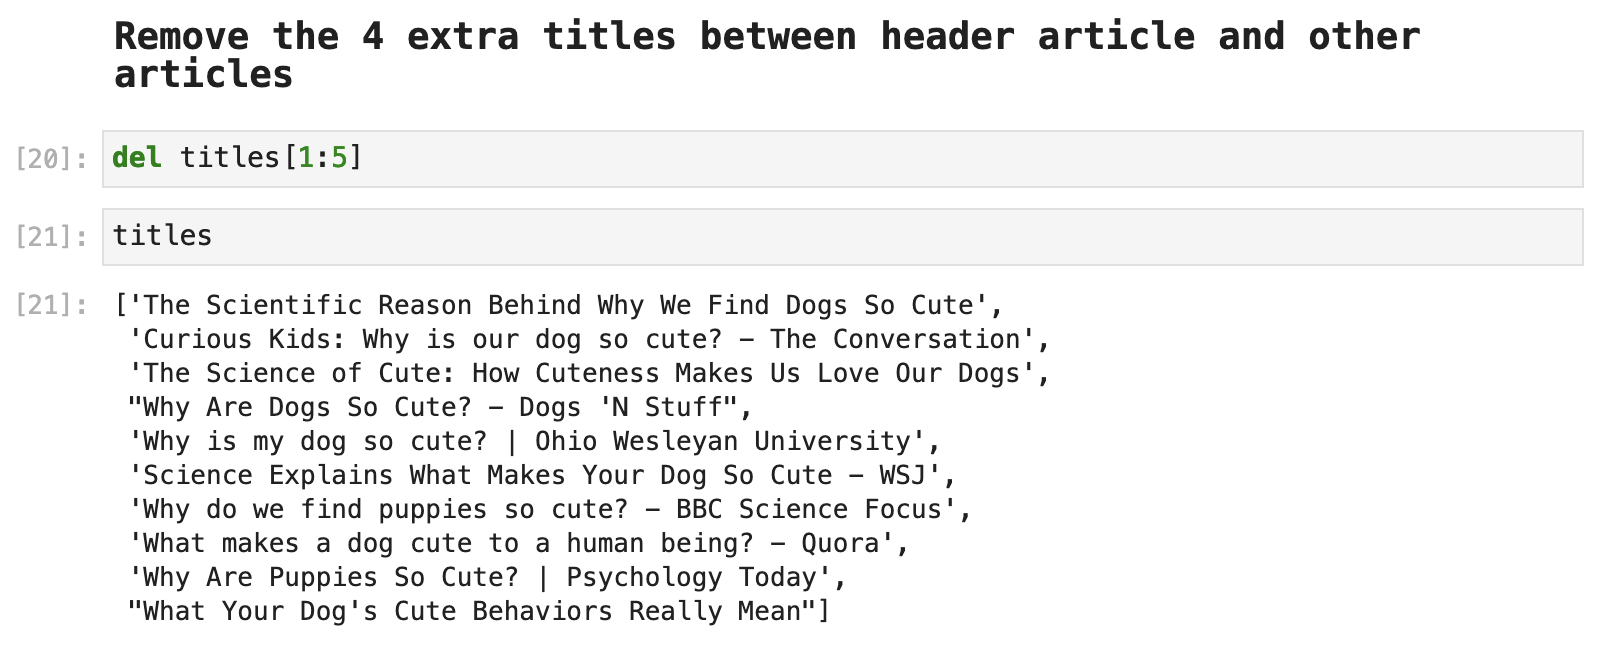
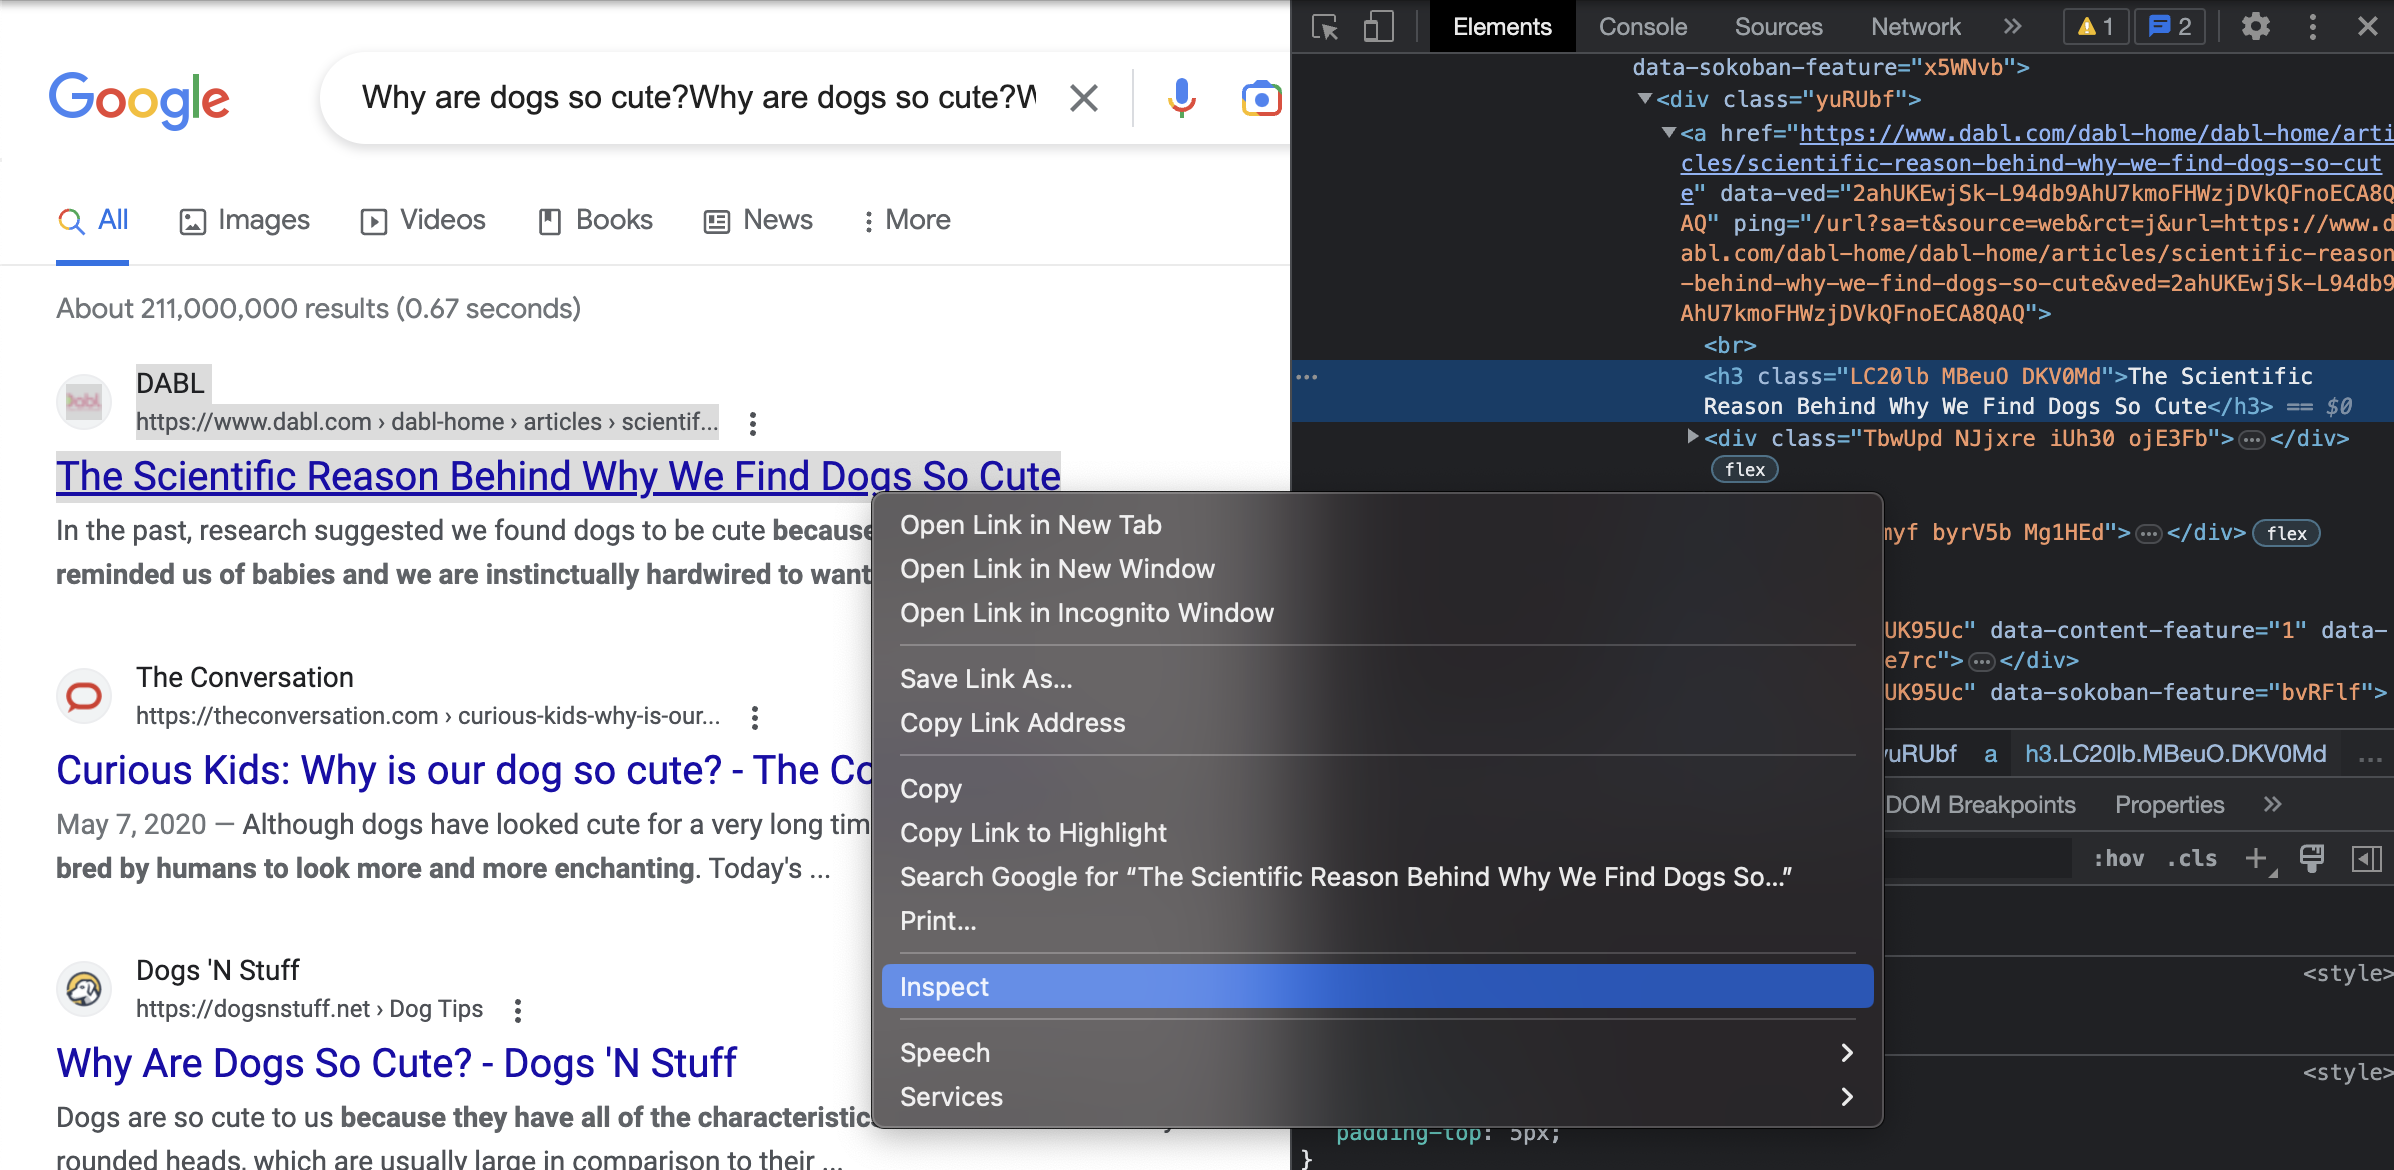
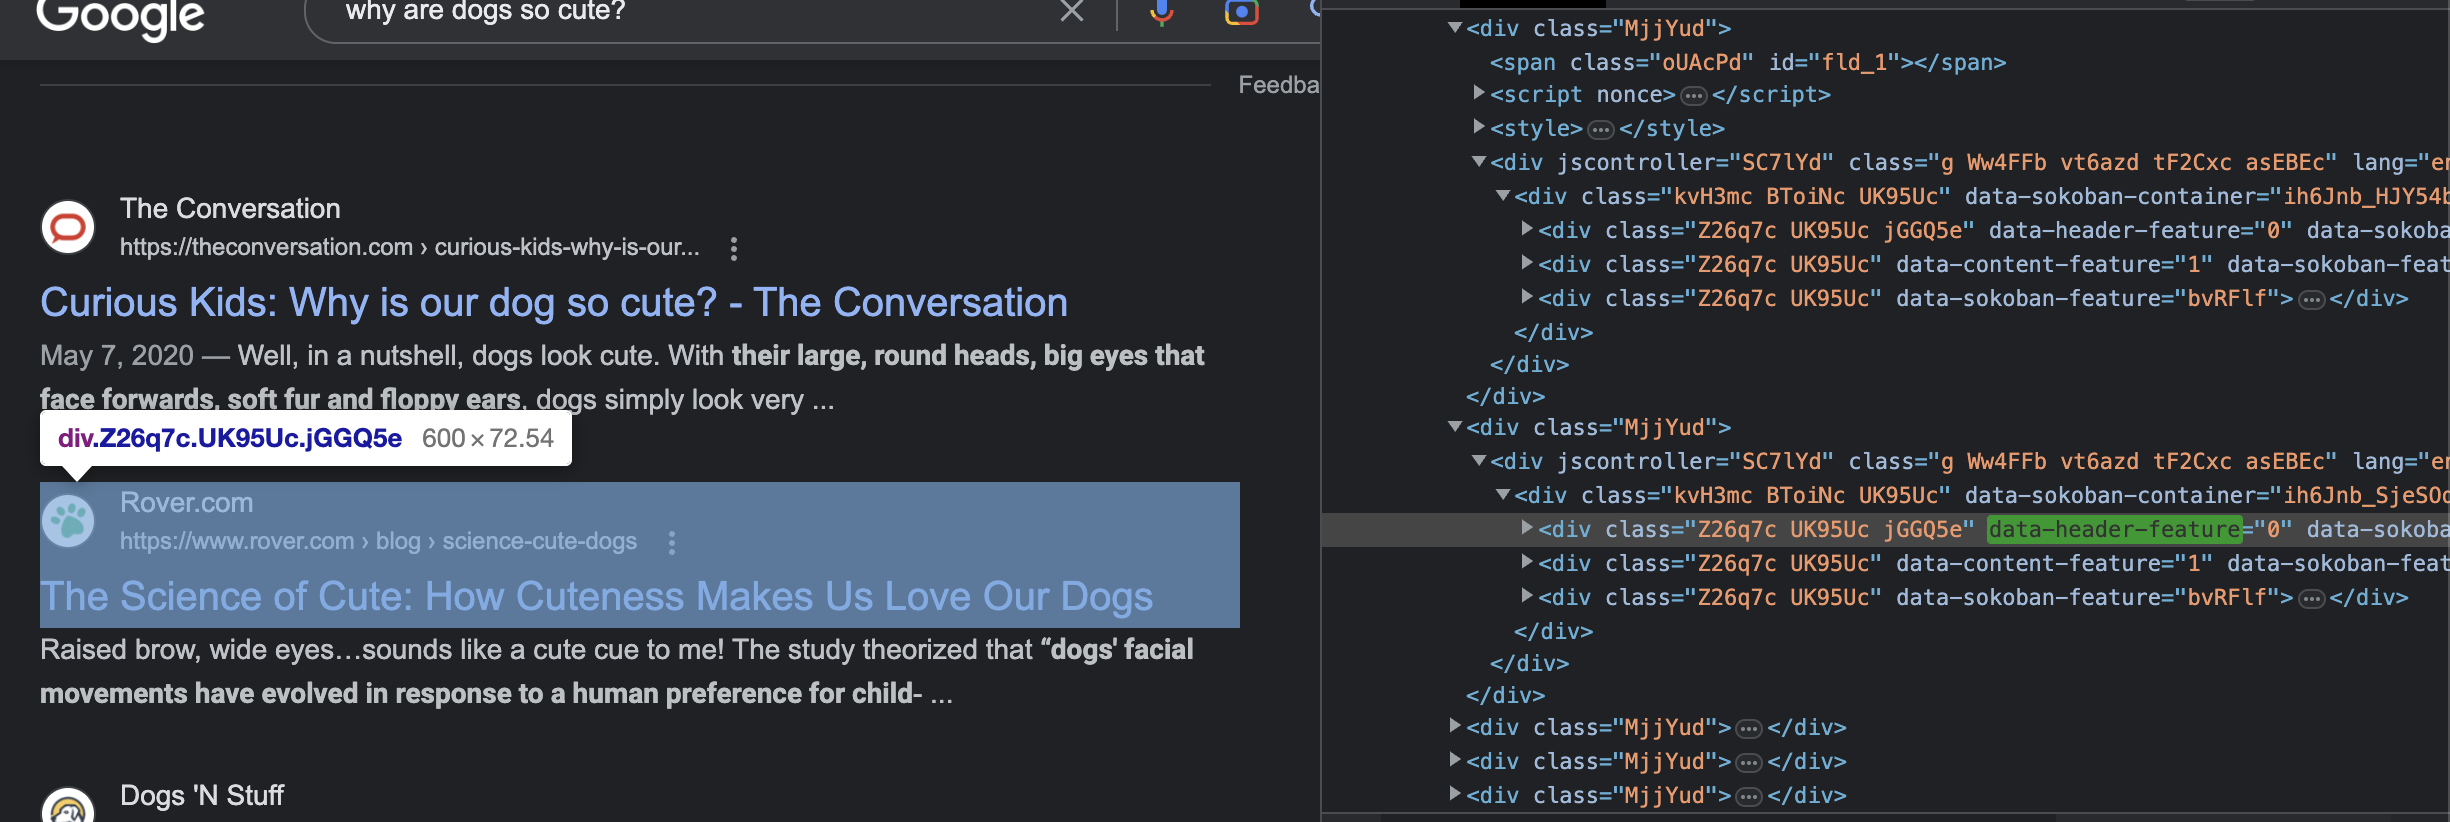
Next, we notice that the first article returned by Google is different from the others in our list of titles. It has its own section set off from the other articles in the results, which comes along with a snippet of the article. It is also tagged differently in the HTML, of course, because it appears very differently on the page from the other articles.

So we will grab this first, what I call "header", article and its link using the tags we found associated with each when we used Inspect on the header article section of the page, shown just above.
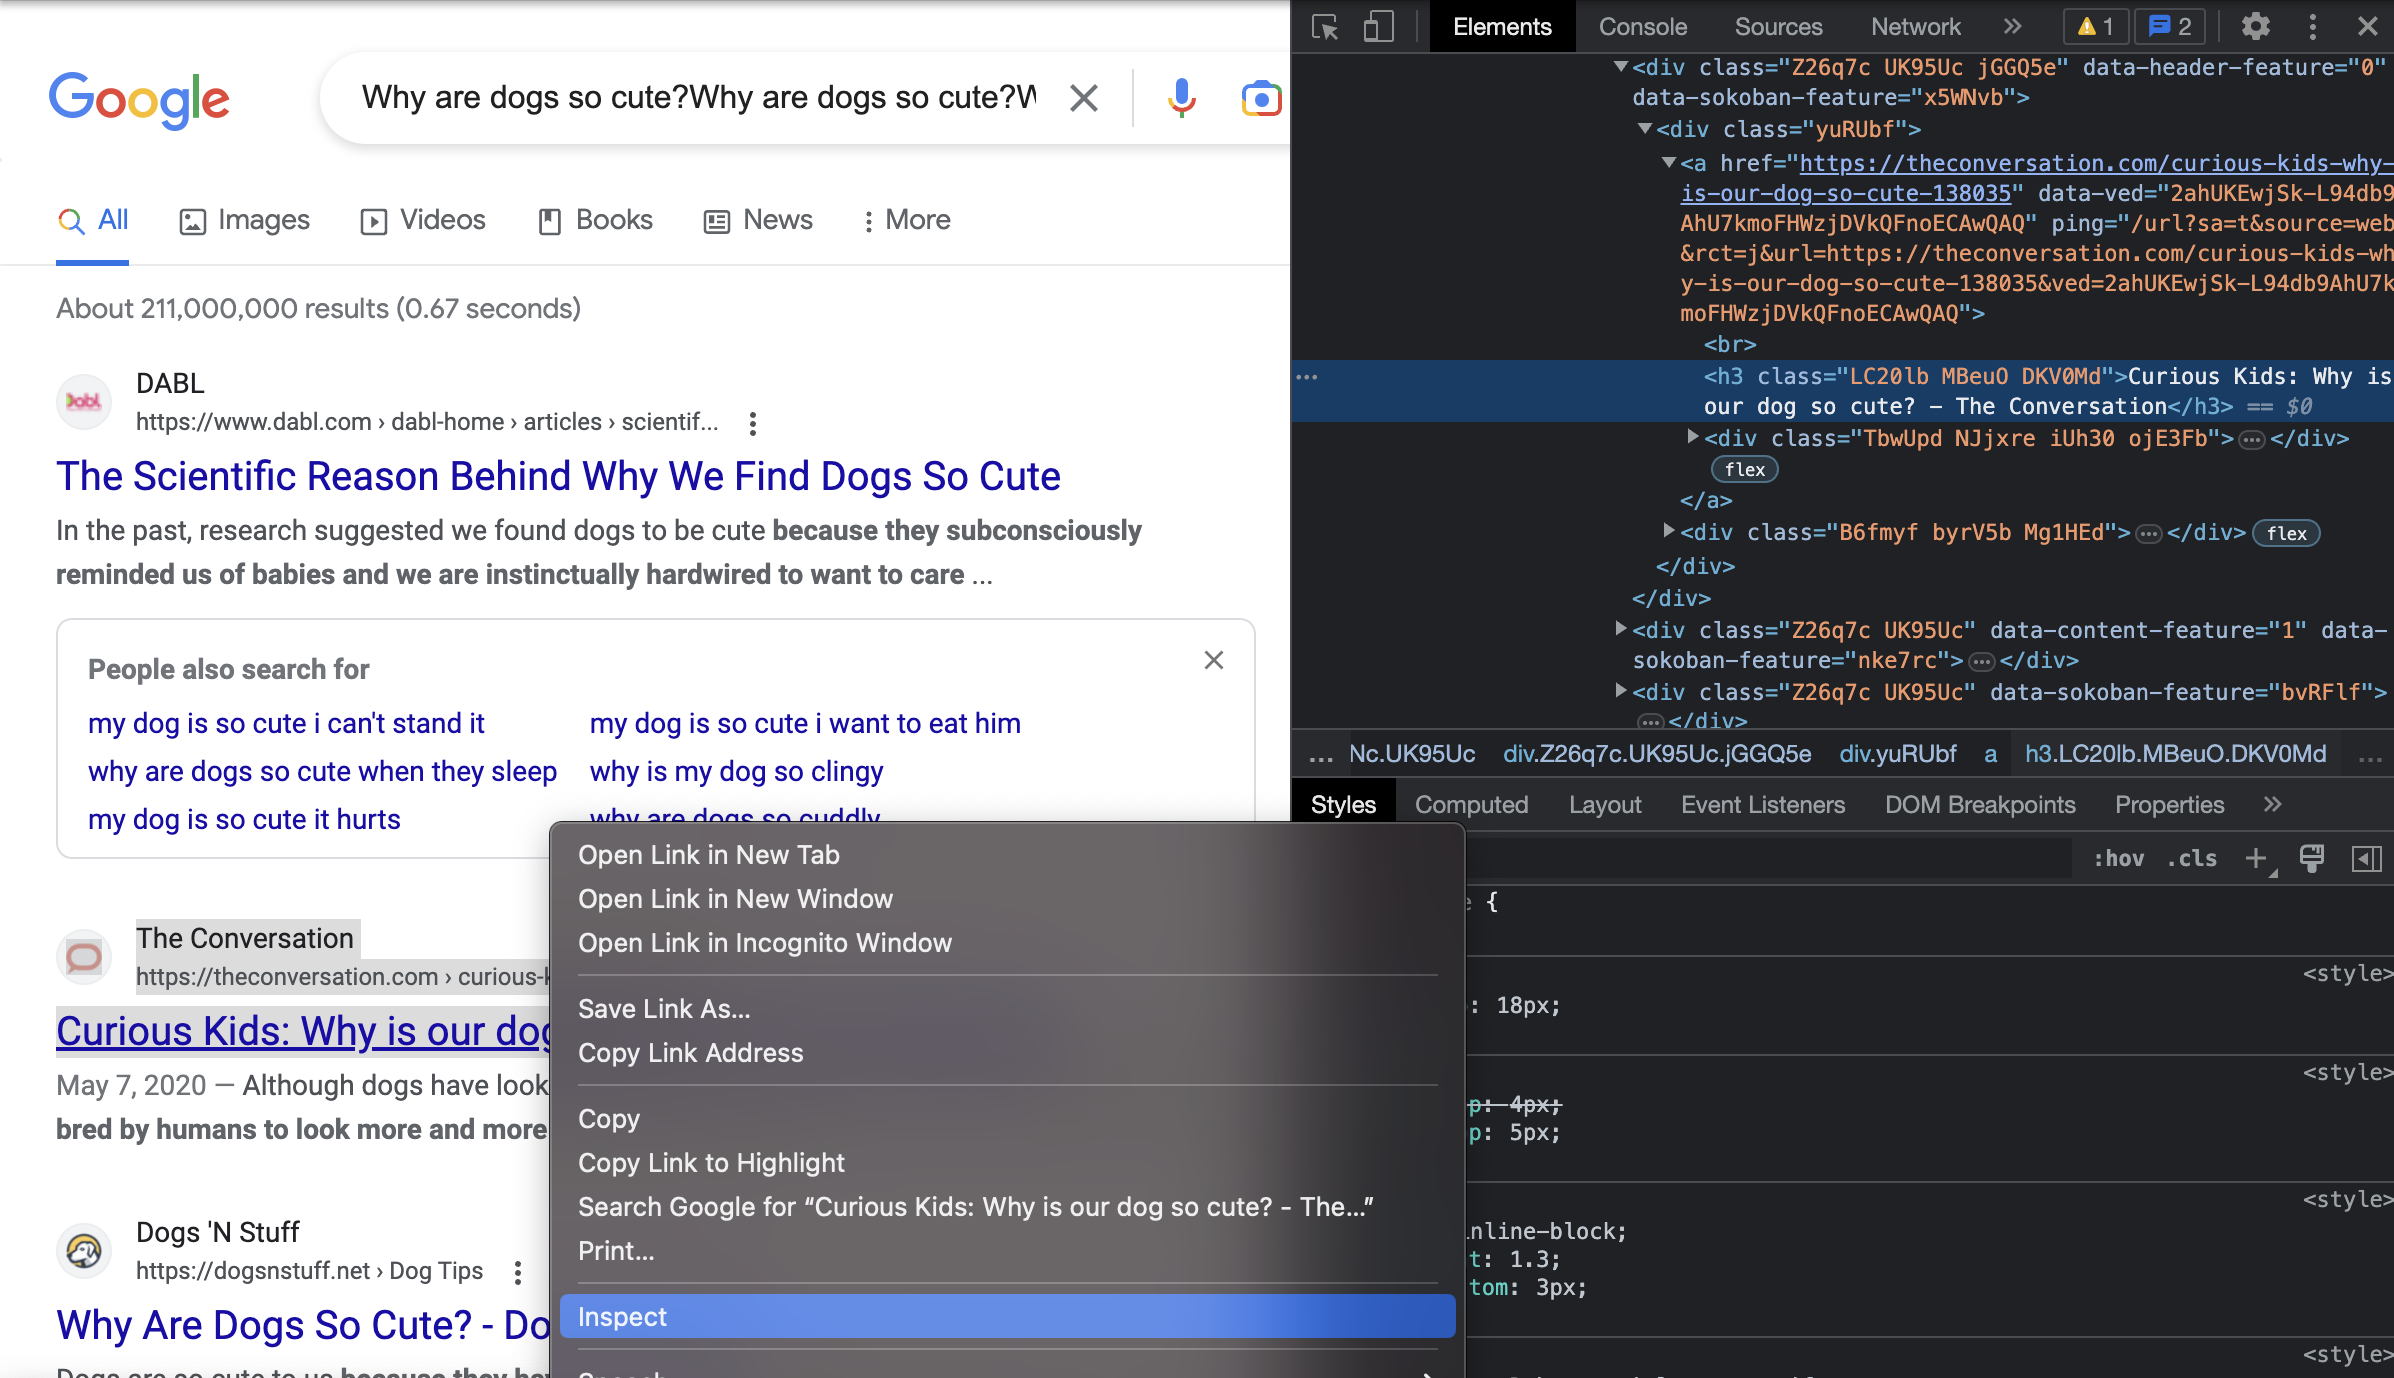
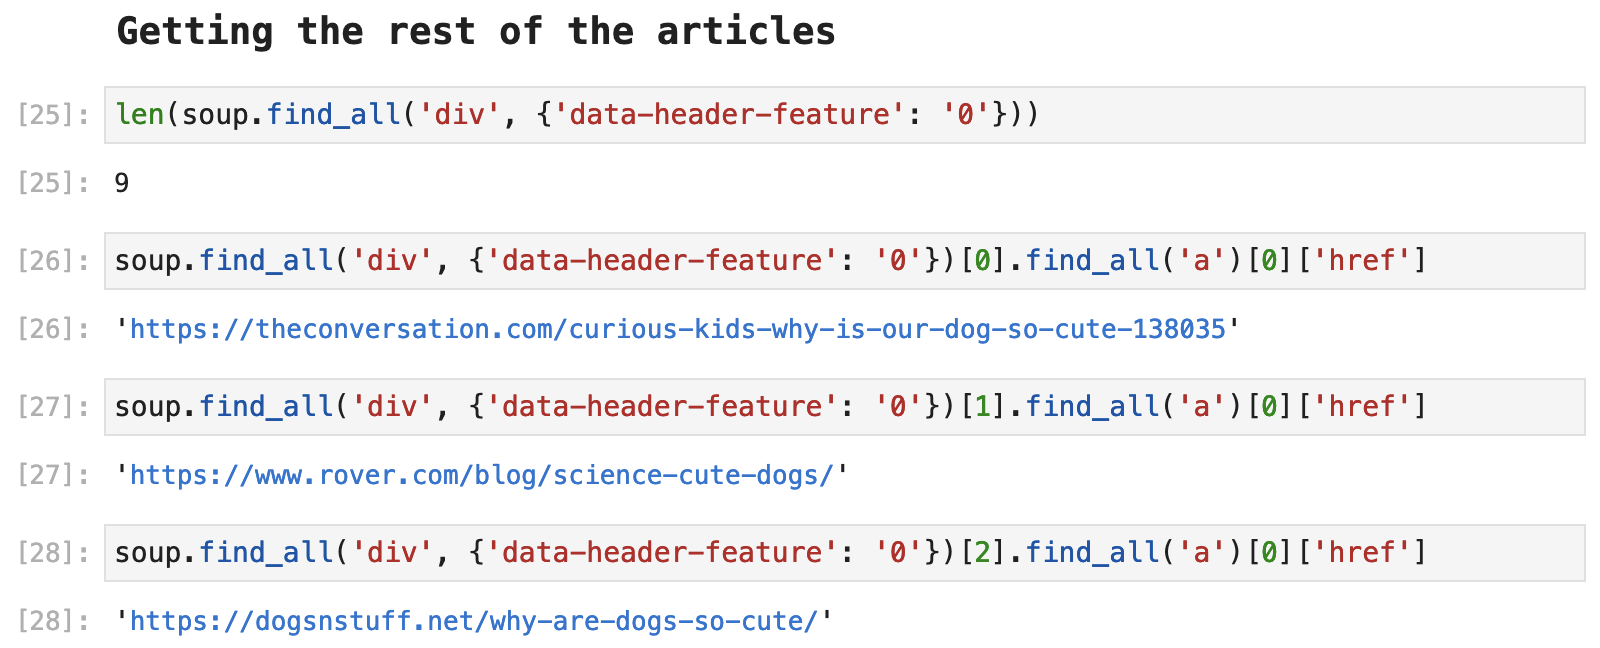
Next, we find that there are 9 other articles, all of which share the same tags and formatting in the HTML. So we can grab these using Beautiful Soup and a for-loop.

The following code shows the first three articles' and how we use Beautiful Soup to access the URLs for each.
And if we create a for-loop based on this code, we can get each article's URL and compile a list that will match up with the list of titles we previously collected.
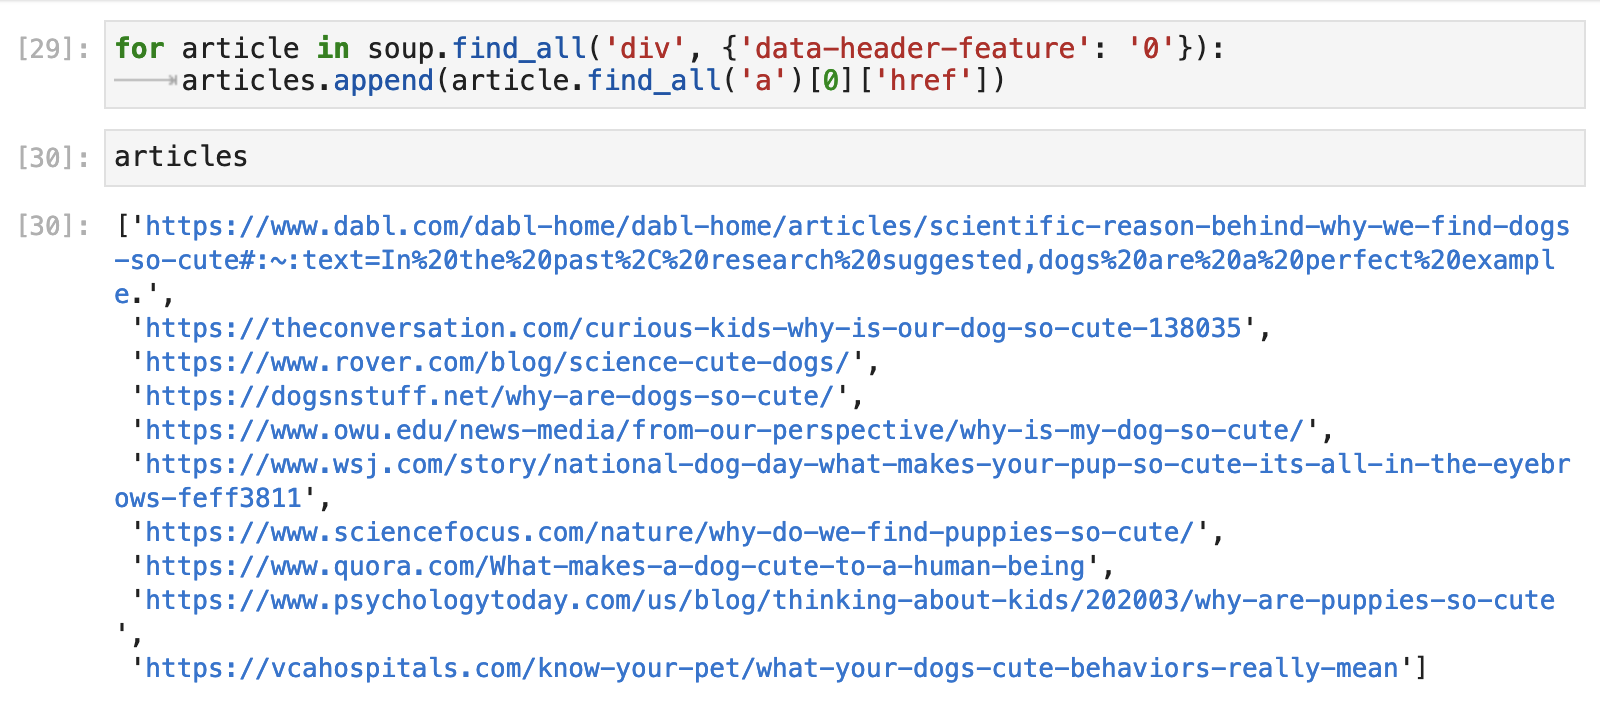
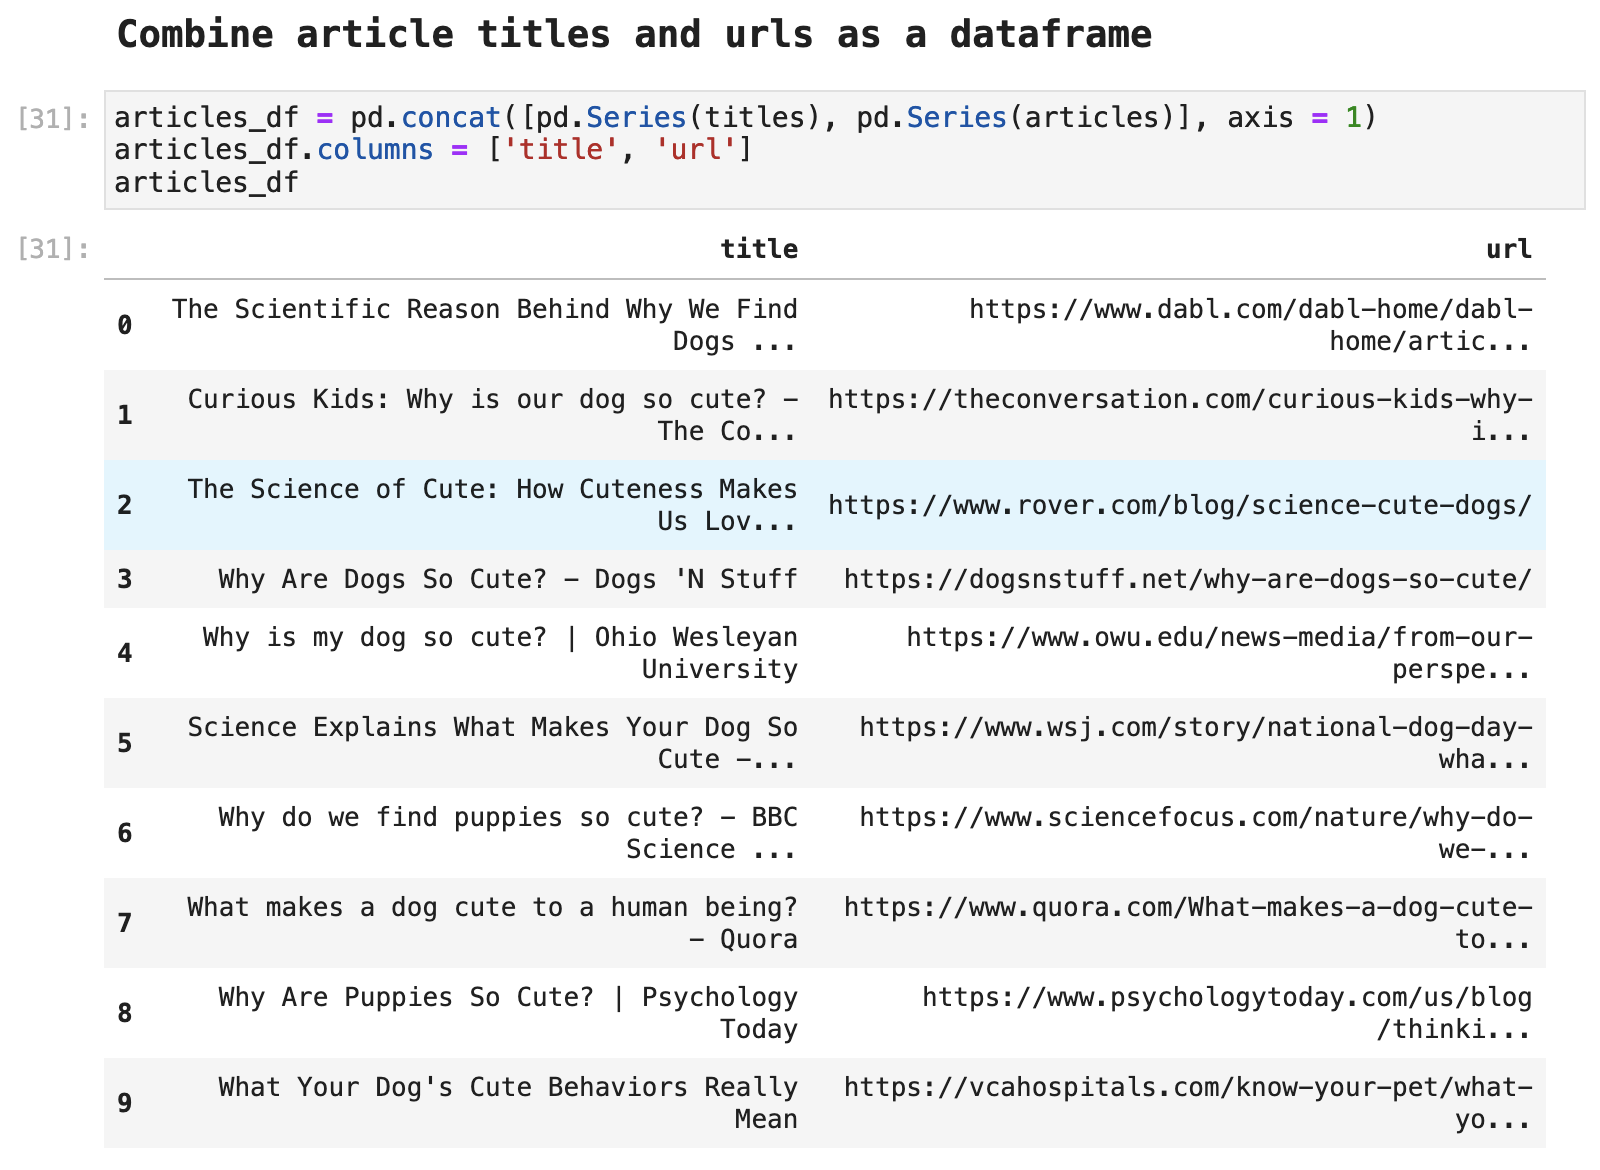
And VOILÁ, we can create a nice and neat little dataframe with titles and URLs for the first 10 results returned by our Google search. It is not too hard to see how this can be automated and scaled to collect far more data following a similar process.
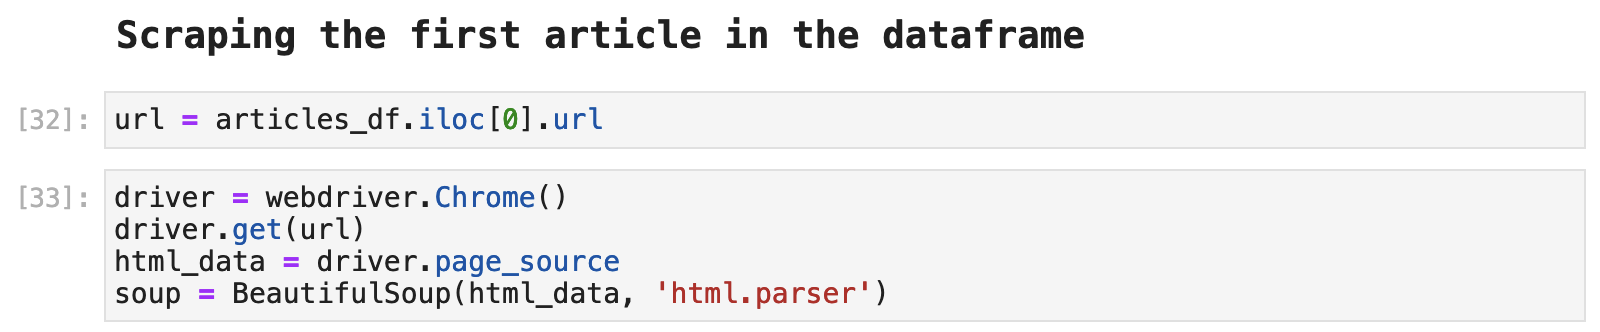
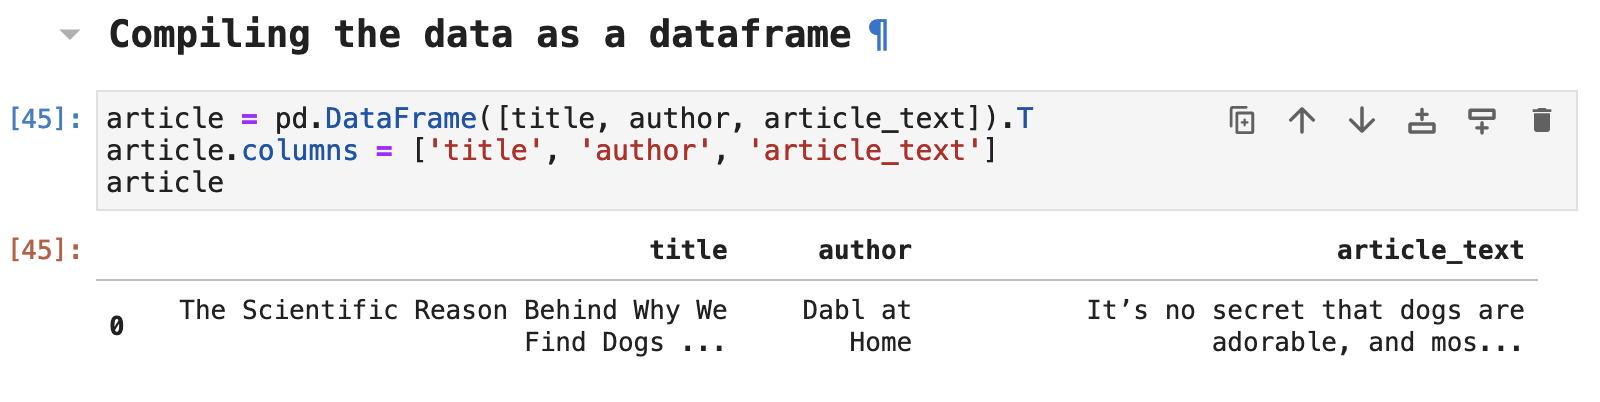
Scraping the first article from the Google results
In order to scrape the articles returned by the Google search, we can follow the same steps we did in the beginning of this article and just tailor the code to match the tags in the HTML data. Once again, we instantiate a webdriver and pass it the URL of the page we would like to scrape and create our soup.
Once again, the title for the page is tagged with <h1>in the HTML data, so it is easy to access and grab.

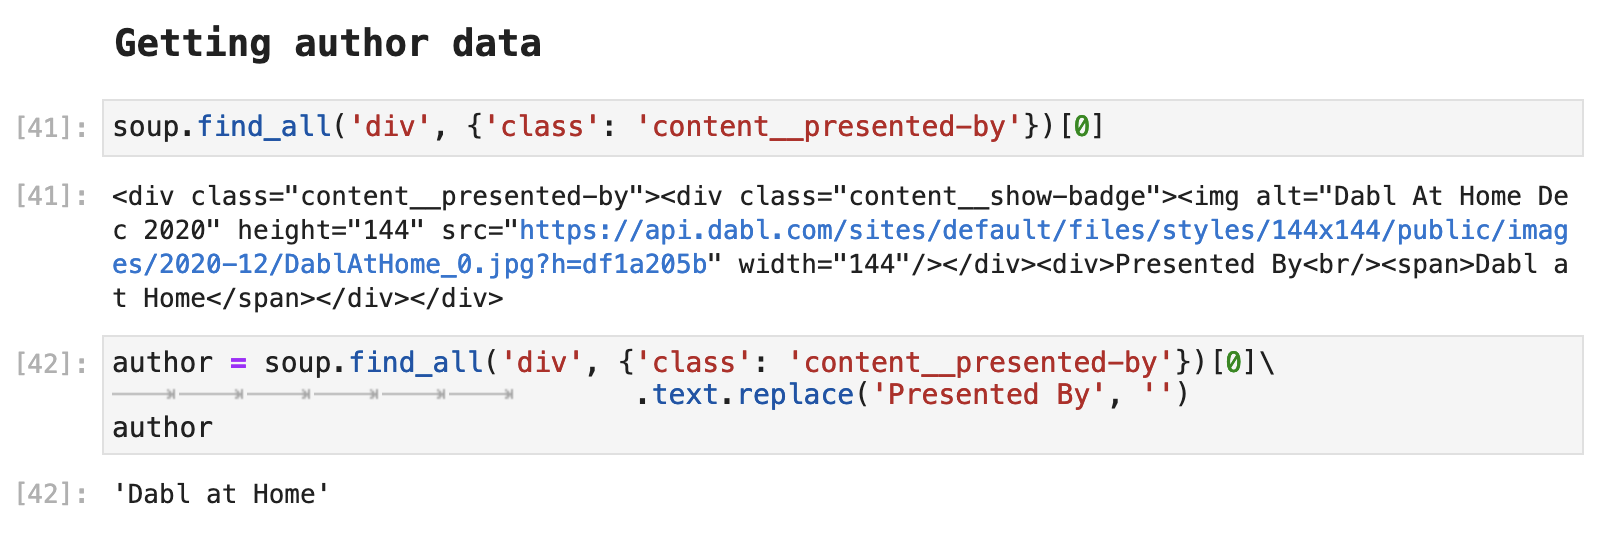
The author data is a bit different in this case. And it requires a little more cleaning than before. This is very often the case with various web sources. So it can become tedious pretty quickly. But it is also like a fun puzzle that is very rewarding to solve page after page after page.
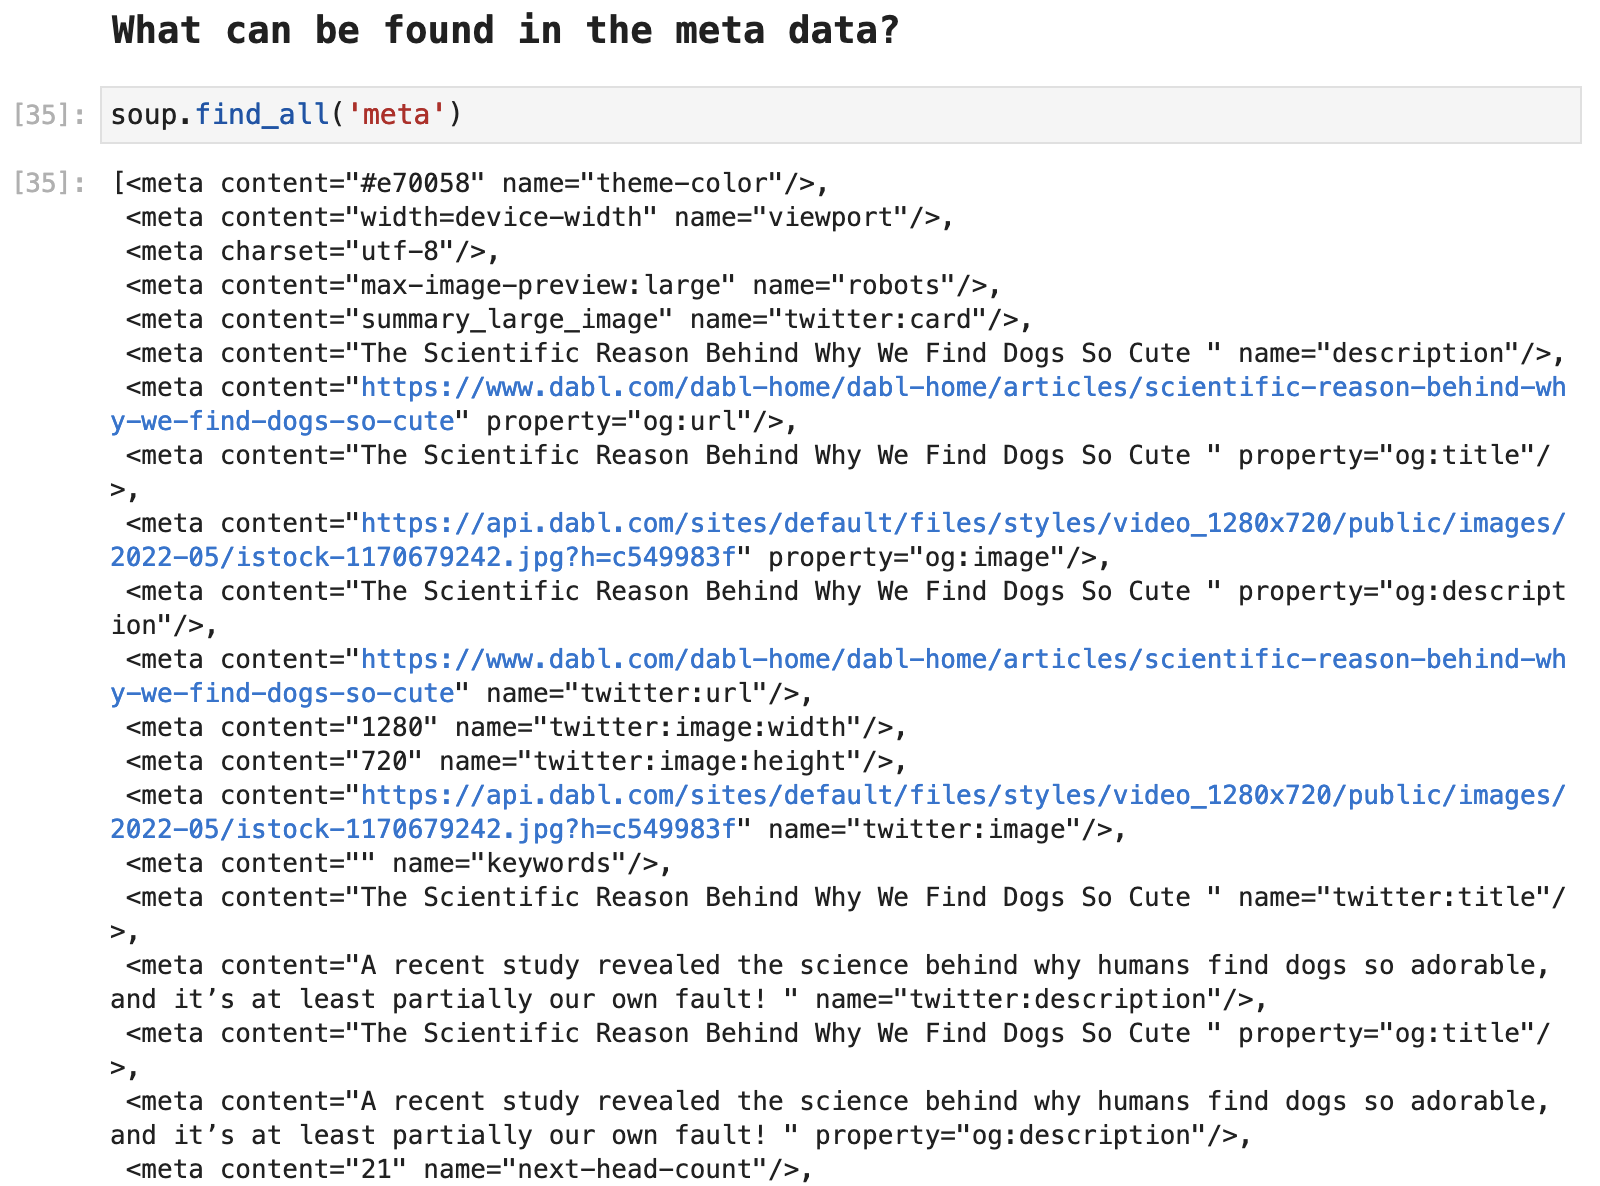
One aspect of scraping that is important to keep in mind is that you can often find a great deal of data about the source from the meta tags. The following is all of the data within this source that is included in the meta tags.
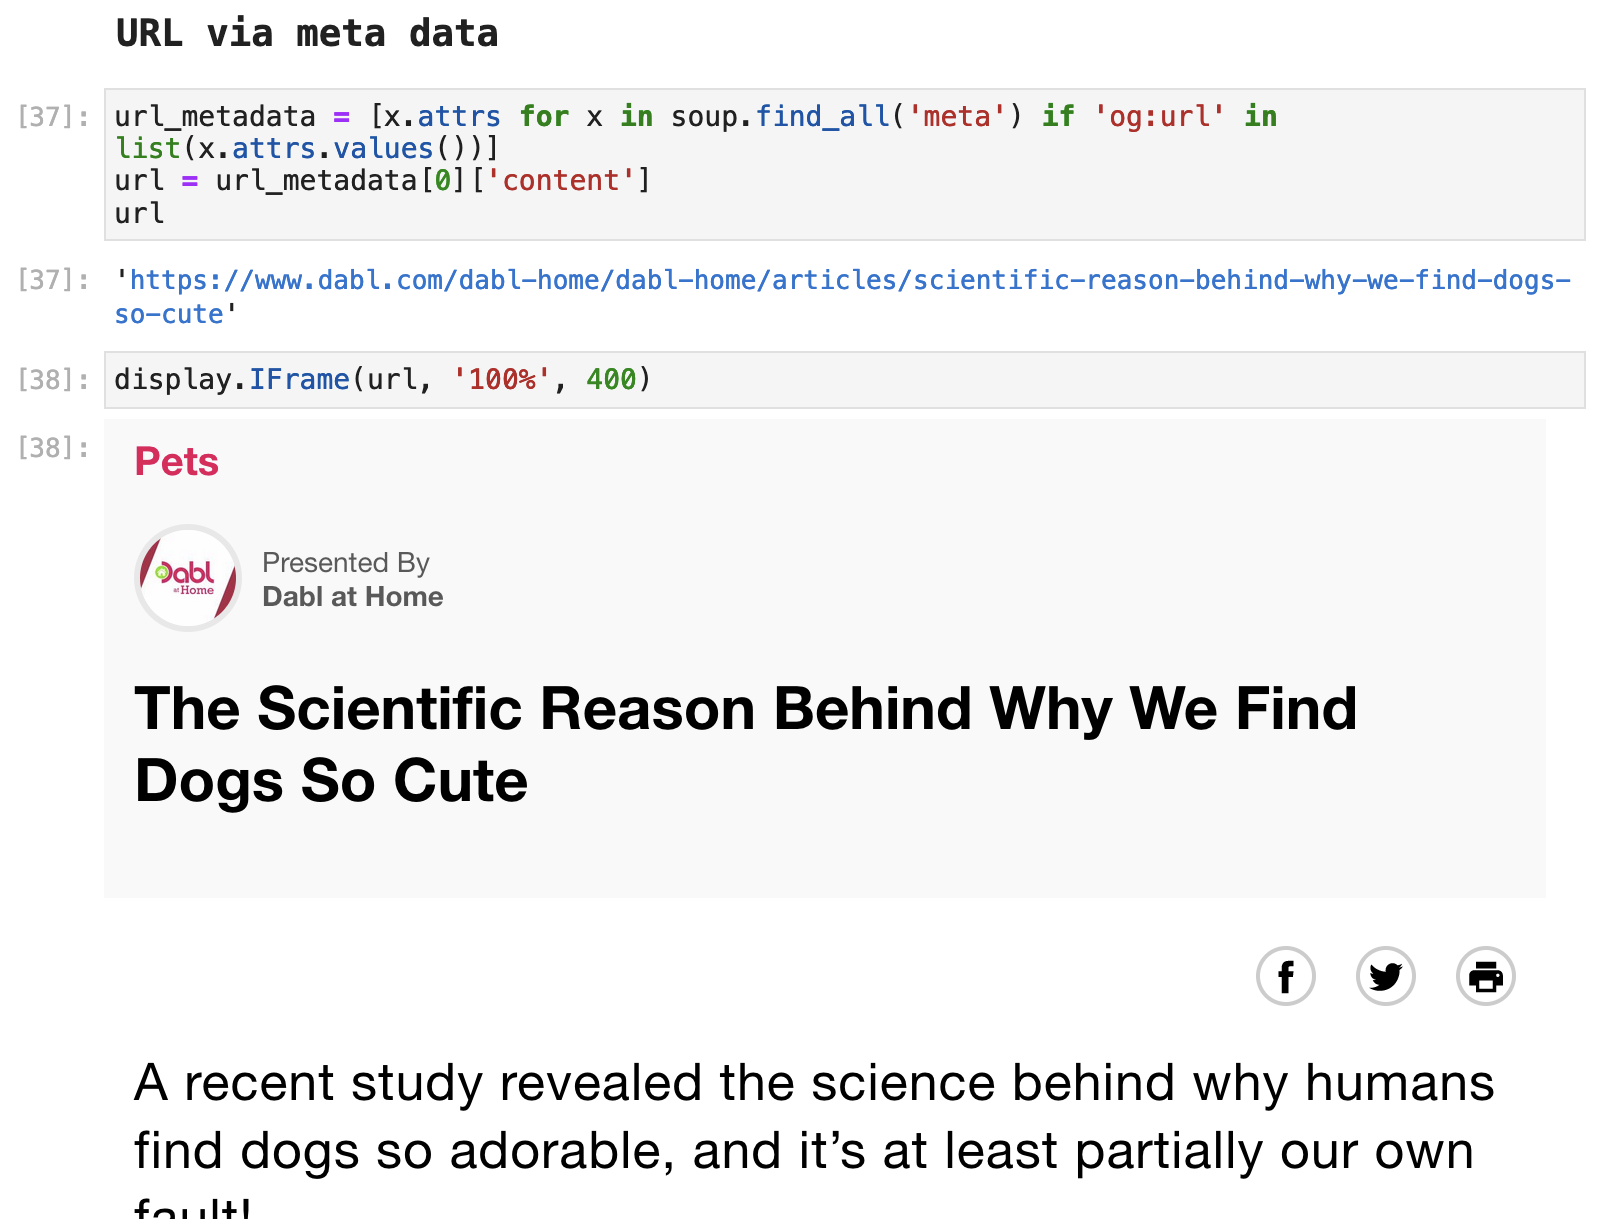
So via the meta tags, we can access the title as well, although, it does take a little extra digging around in the tags and resulting returned data to actually extract the title of the article in this way.

We can also access URL data from the meta tags. In this case, we already had the URL for this page, because that is how we got here. But sometimes, it is useful to be able to grab related links and other sources via meta data URLs. The following is an example of how to do so.
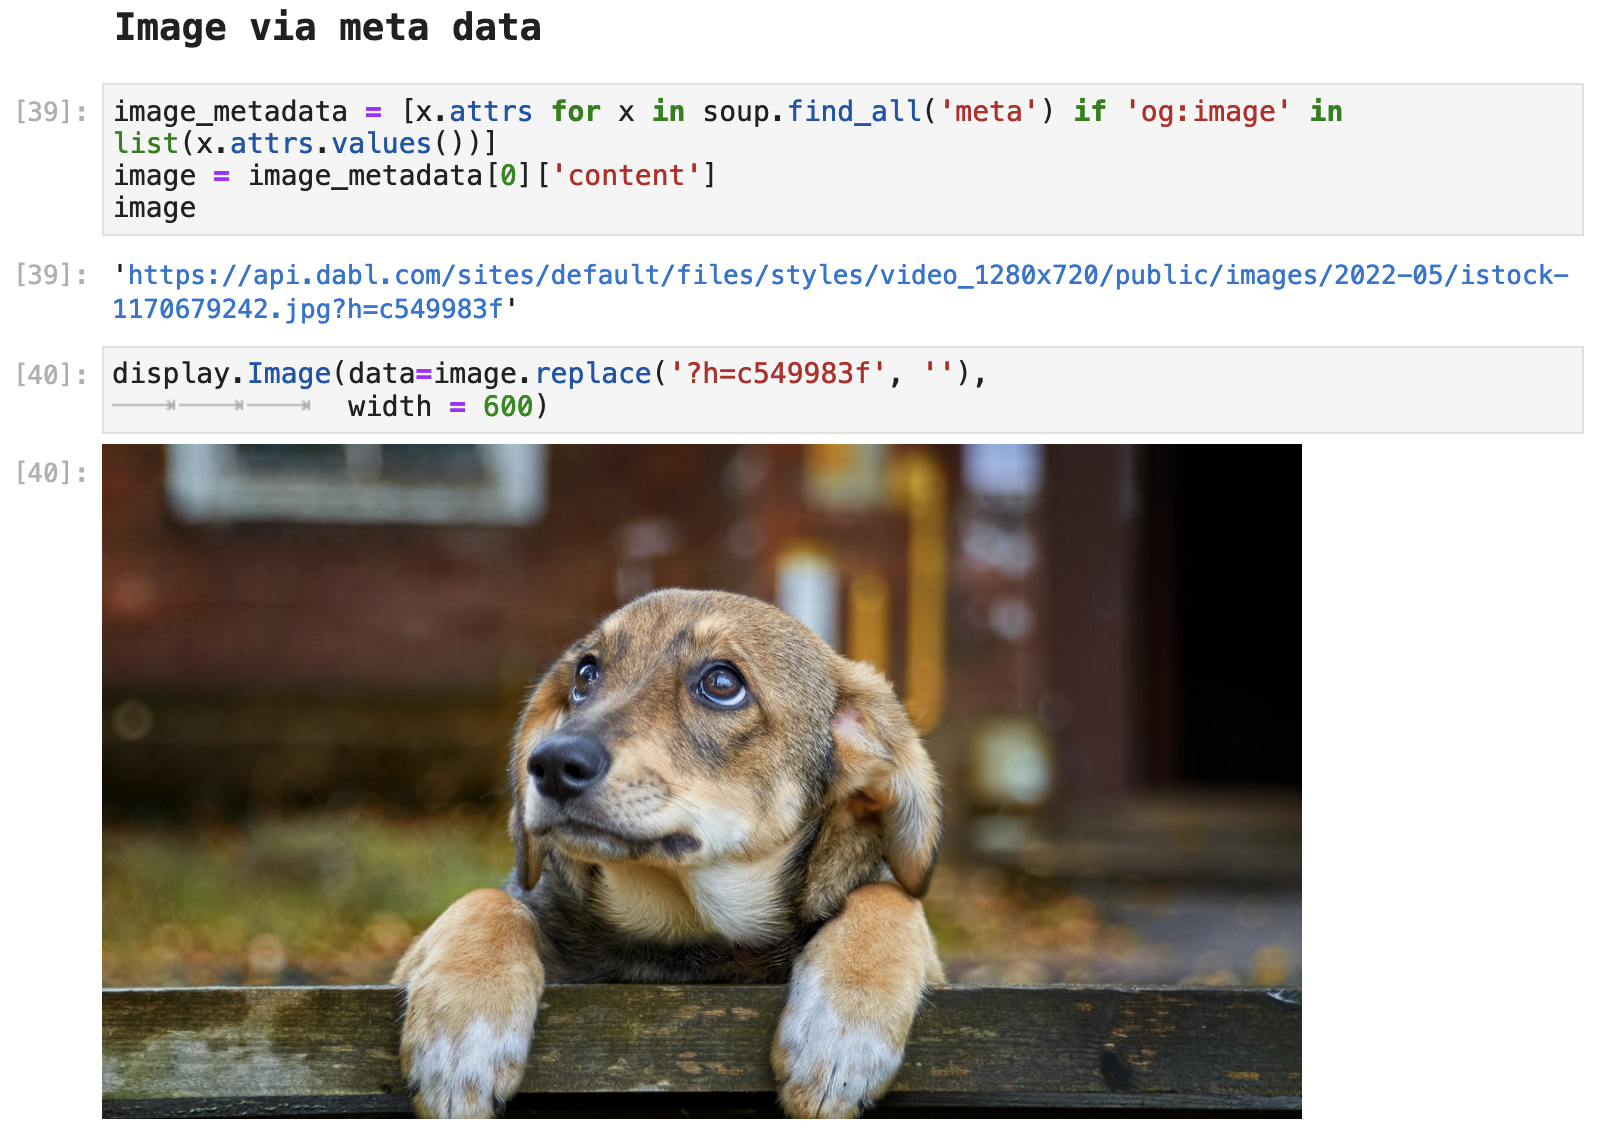
And just because we CAN retrieve the original image for the article via the meta data, and because it is so incredibly cute, let's just look at one more cute little pup pic!
Accessing the article text from this page can be done a couple of different ways. Let's go ahead and look at those.
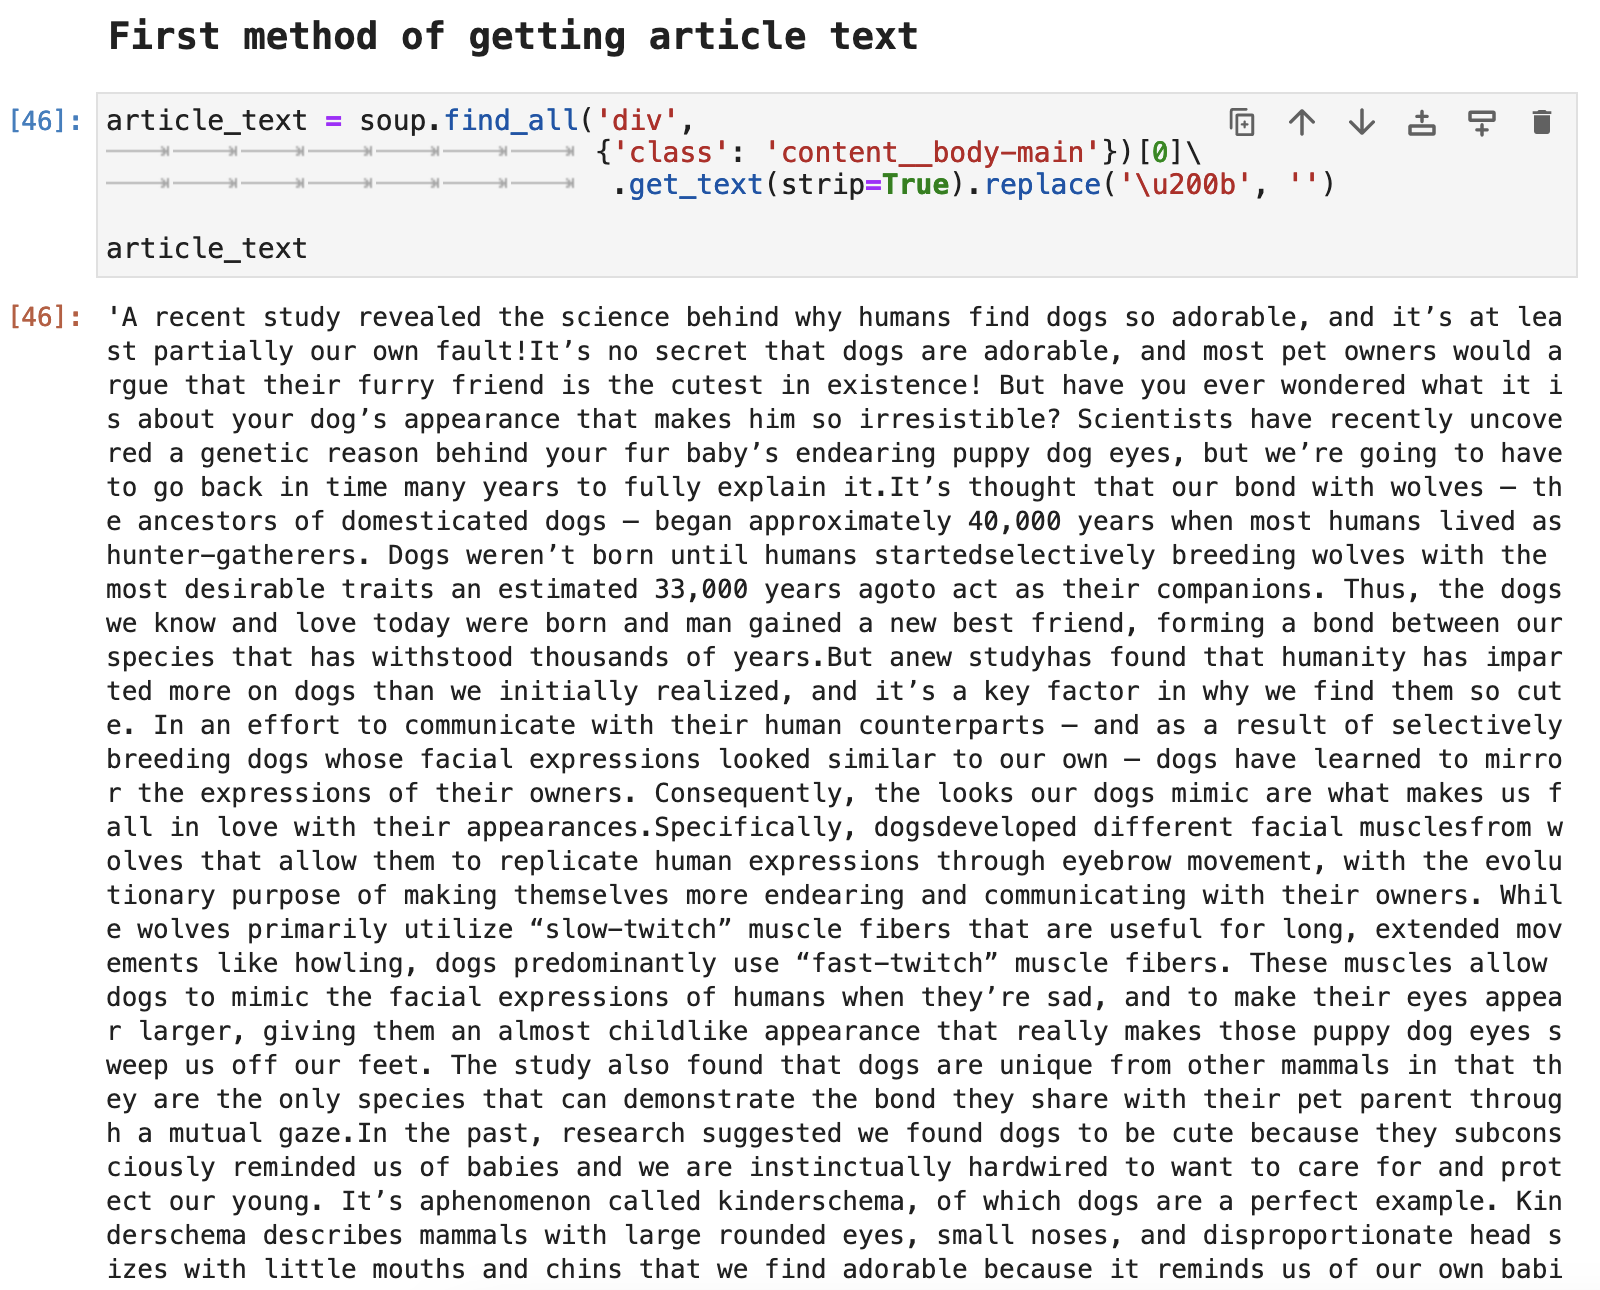
First we can access all of the article data by using overall body div that contains the article text. This method requires its own forms of text cleanup as shown below.
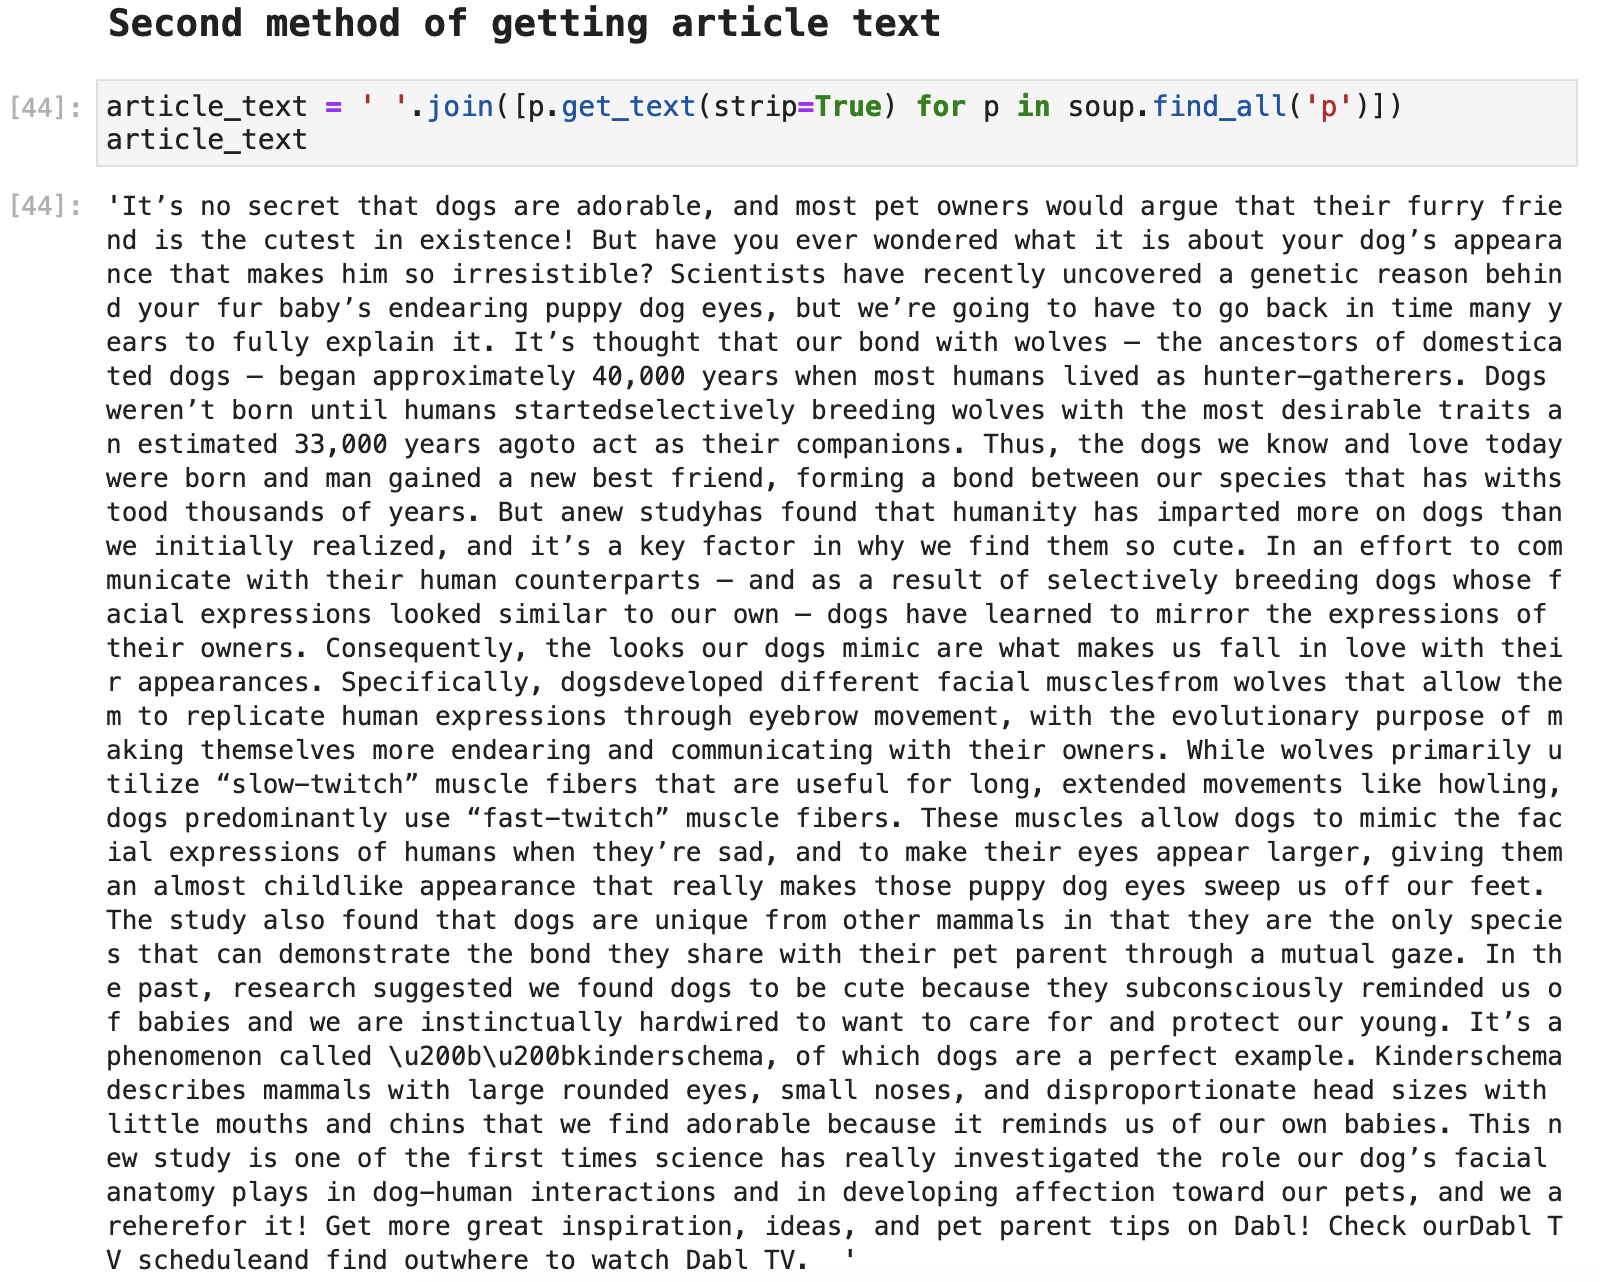
We can also access the article text by paragraph.
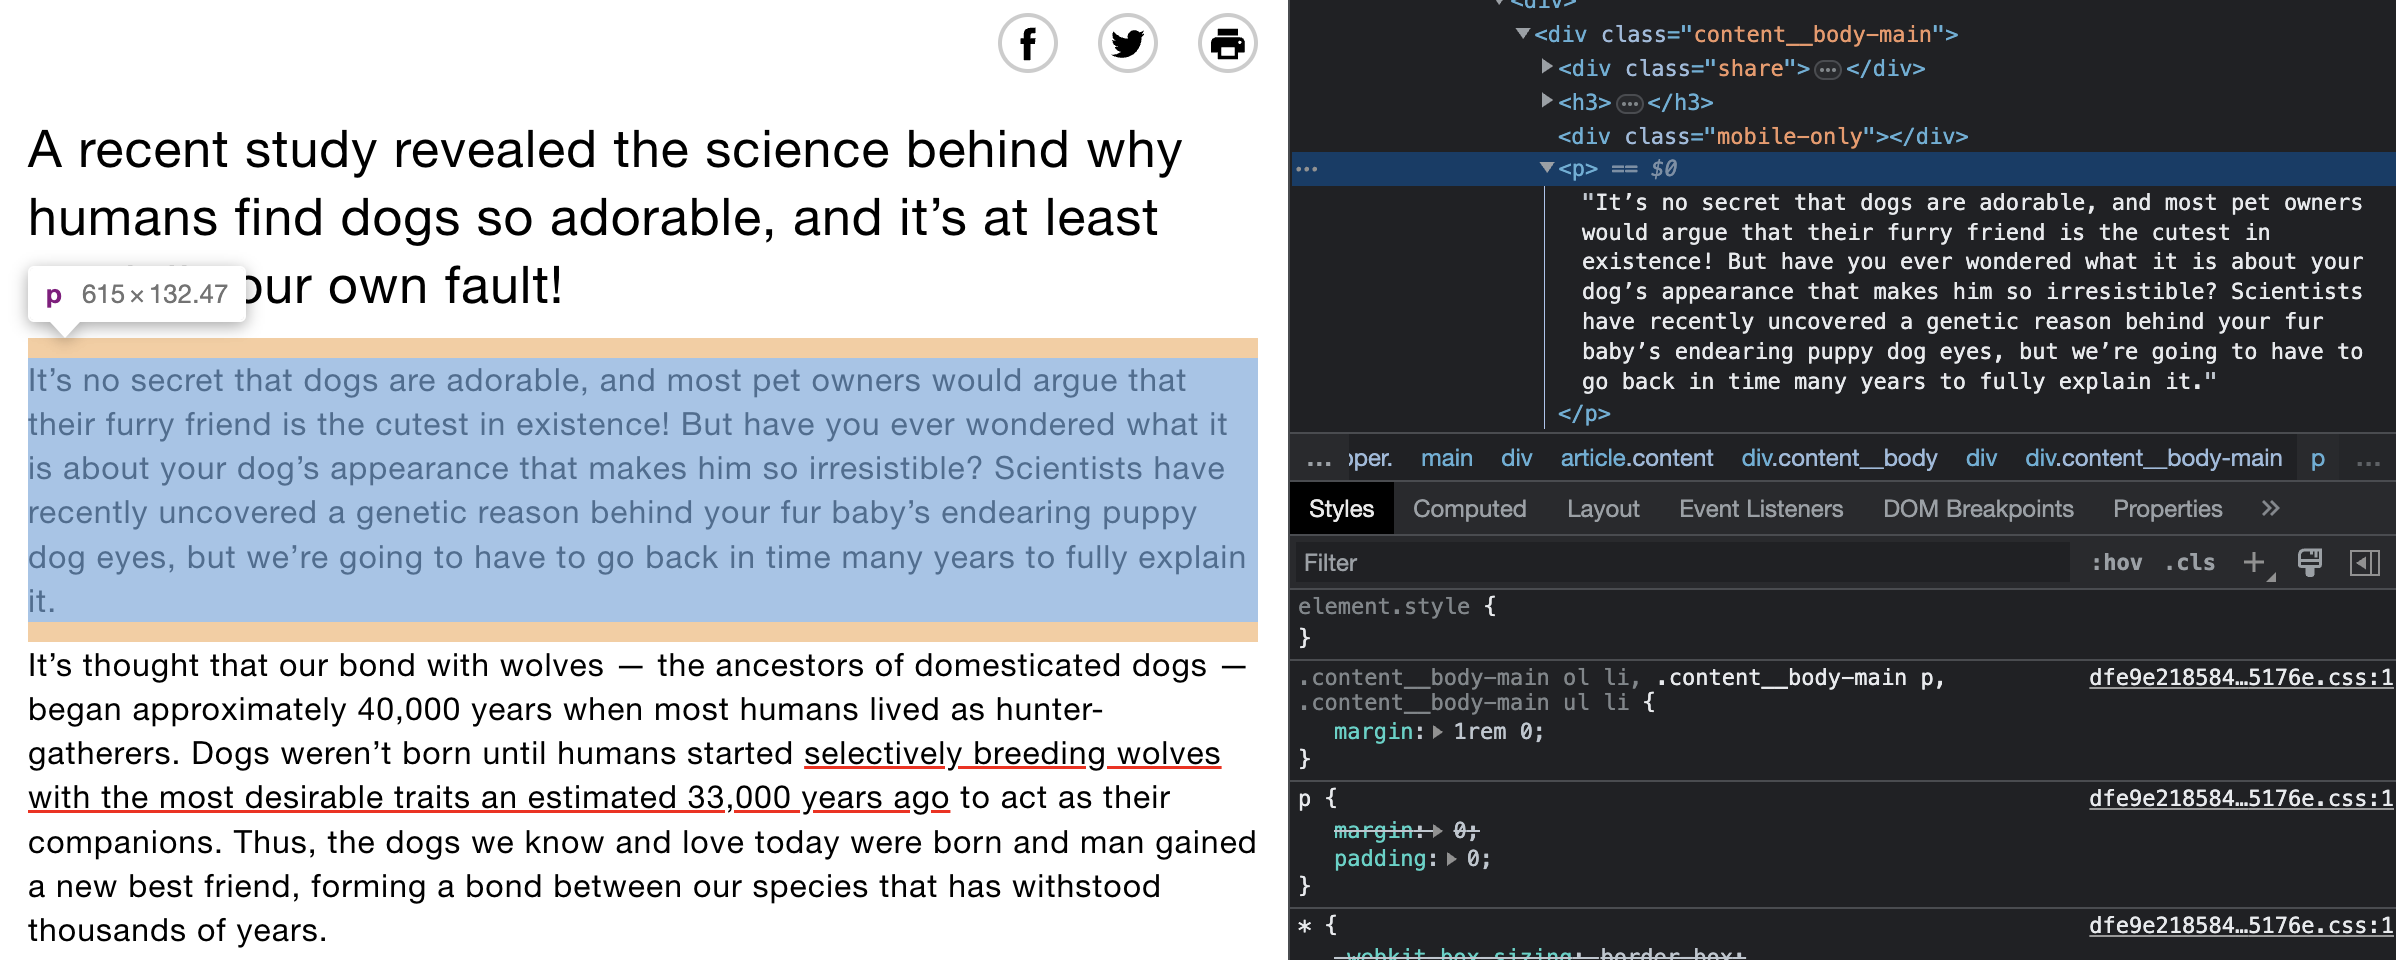
Taking this route, it is just a bit different in code and requires a slightly different text clean up. The choice between the two is a matter of taste to some degree. But often one way of accessing the text proves to be cleaner and requires fewer steps than another. Much of this is a matter of trial and error and figuring out how each web source structures their pages.
This data can then be compiled as a dataframe. And this simple process of collecting the article from the search result URL could be performed repeatedly on each article resulting from our search, all of the results of which could be added one by one to the article results dataframe.
The Code: Gist | GitHub | Jupyter | HTML | PDF
Conclusion
Thank you for taking this little journey with me! It is good to be back and sharing my data science journey with you. And I hope you learned something new and exciting here today. I absolutely love web scraping and all the challenges and puzzles that come along with it. The more I delve into the world of data engineering, the more powerful I feel as a data science practitioner! I hope you find the same satisfaction on your journey as well.
Happy data wrangling! Be safe!